Trigger: Webhook (webhook_trigger)
This trigger starts an automation when an external system makes an HTTP call to a URL generated by the platform. It is ideal for integrations with third-party services, scripts, or any system capable of sending HTTP requests.
When to use it?
- When an external service (GitHub, Stripe, a custom script, etc.) needs to fire an automation by sending an HTTP request.
- When you want to receive data from a third-party system and process it in a flow.
- When you need a public URL that acts as an entry point to an automation.
If you need to react to internal system events, use Trigger: Event.
If you need a manual trigger for testing, use the "When clicked in Test Automation" trigger.
How to configure it (recommended: using the form)
Most users should use the Form tab. It is the safest way and avoids formatting errors.
Step 0) Open the parameters
- In the automations canvas, double-click the Webhook node.
- A modal opens with two tabs: Form and JSON Editor. Stay on Form.
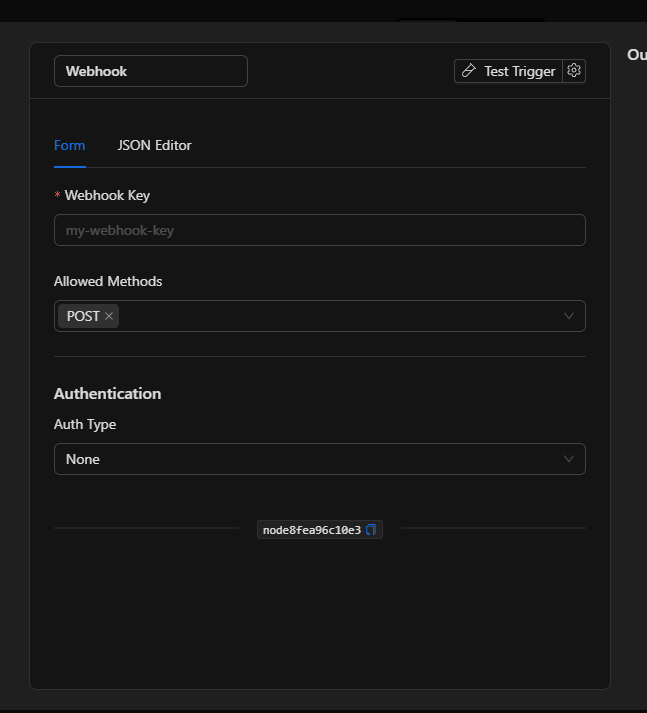
Step 1) Define the Webhook Key
The Webhook Key is the unique identifier for this webhook. It defines the URL you will share with the external system.
- Write a descriptive name: for example
fire-alerts,stripe-payments, orfront-door-sensor. - Only allowed: letters (
a-z,A-Z), numbers (0-9), hyphens (-), and underscores (_). - Do not use spaces or special characters.
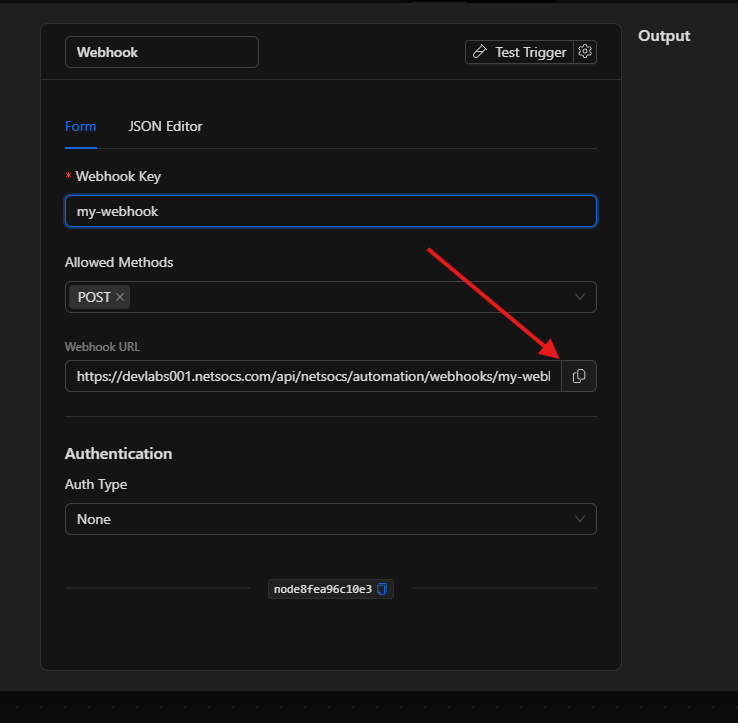
Once you type the key, the generated URL appears automatically below the field.
The generated URL
When the Webhook Key is valid, the platform displays the full URL you should use:
https://your-instance.netsocs.com/api/netsocs/automation/webhooks/my-webhook-key
- There is a copy button ( copy icon ) to the right of the URL.
- This is the URL you need to configure in the external system as the webhook destination.
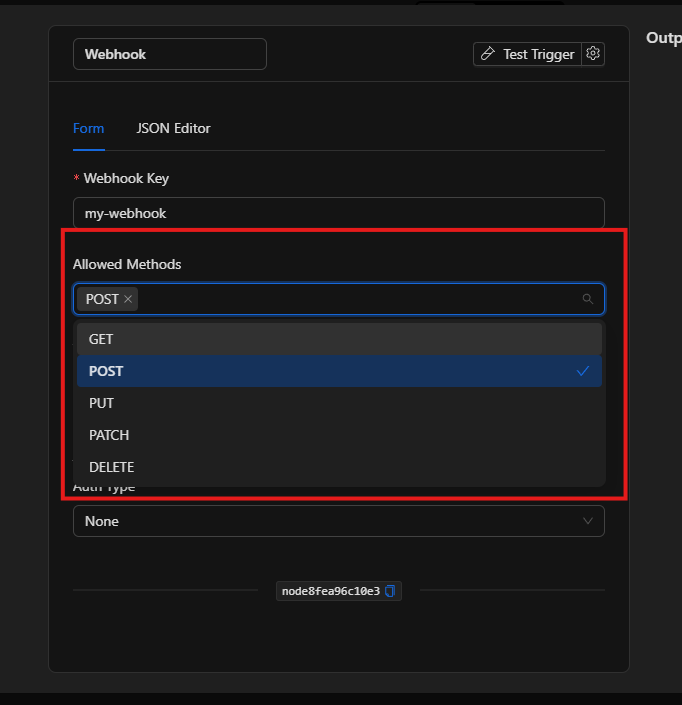
Step 2) Choose the allowed HTTP methods
The Allowed Methods field defines which HTTP verbs the external system can use to call this webhook.
| Method | When to use it |
|---|---|
POST |
Most common for webhooks (sending data) |
GET |
For simple triggers without a request body |
PUT |
For resource updates |
PATCH |
For partial modifications |
DELETE |
For deletion notifications |
- The default method is
POST. - You can select more than one method at the same time (the field supports multi-selection).
- If the external system calls with a method that is not allowed, the webhook will not fire the automation.
Step 3) Configure authentication (recommended)
The Authentication section defines how the system validates that the call comes from a legitimate source. There are four options:
Option A — None (no authentication)
- The URL accepts any call without validating identity.
- Only recommended for testing or fully closed networks.
- In production, anyone who knows the URL can fire the automation.
Option B — Header (custom header)
Verifies that the request includes a specific HTTP header with a secret value.
| Field | Description | Example |
|---|---|---|
| Header Name | Name of the HTTP header expected in the request | X-Webhook-Secret |
| Header Value | Secret value that must match | my-secret-123 |
- The external system must include this header in every request.
- If the header is absent or the value does not match, the webhook is rejected.
Option C — Basic Auth (username and password)
Verifies credentials using the HTTP Basic Auth scheme.
- Use the credentials selector to choose or create a credential of type
basic_auth. - If a credential already exists: select it from the list.
- If it doesn't exist: choose Create new credential and fill in the username and password.
- Credentials are stored securely and are reusable across nodes.
Option D — JWT (JSON Web Token)
Verifies that the call includes a JWT token signed with the shared secret.
| Field | Description | Available options |
|---|---|---|
| JWT Secret | Shared secret used to verify the JWT signature | Free text (password) |
| JWT Algorithm | Signing algorithm used when creating the JWT | HS256 (default), HS384, HS512 |
- The external system must send the JWT in the
Authorization: Bearer <token>header. - If the token cannot be verified with the configured secret and algorithm, the webhook is rejected.
Best practices
- Always use authentication in production: at minimum Header with a long, random secret value.
- Use descriptive keys:
stripe-confirmed-paymentsis better thanwebhook1. - Restrict methods: if the external system only uses
POST, leave onlyPOSTenabled. - Don't expose the URL without authentication in environments accessible from the internet.
- Use JWT if the external system already has native support for signing tokens.
- Use Basic Auth or Header if you want the simplest and most secure option at the same time.
- Test before activating: send a test request from the external system and verify the flow fires.
Troubleshooting (common issues)
- The webhook doesn't fire
- Confirm that the Webhook Key is saved and the URL used by the external system matches exactly.
- Verify that the HTTP method used by the external system is in the "Allowed Methods" list.
- If authentication is configured, make sure the external system is sending the correct credentials.
-
Temporarily try
Auth Type = Noneto rule out authentication issues. -
The webhook returns error 401 or 403
- Authentication failed. Check that the header, username/password, or JWT match what is configured.
- For Header: verify the exact name and value (case-sensitive).
- For Basic Auth: check that the selected credential has the correct data.
-
For JWT: verify that the algorithm used to generate the token matches the configured one (
HS256,HS384,HS512). -
The webhook returns error 405 Method Not Allowed
- The external system is using an HTTP method that is not enabled.
-
Add the corresponding method in Allowed Methods.
-
I don't see the generated URL
-
The URL only appears when the Webhook Key field has a valid value (no spaces or special characters).
-
I want to change the Webhook Key without losing the configuration
- You can change the key from the form. Keep in mind that the external system will need to update its URL with the new key.
Advanced configuration (JSON Editor) (expert users only)
The JSON Editor tab lets you view and directly edit the structure stored by the node. Useful for:
- Copying configurations between flows.
- Pasting configurations from another instance.
- Reviewing the exact state of the node.
input structure
{
  "ruleSet": {
    "webhook_key": "my-webhook-key",
    "allowed_methods": ["POST"],
    "auth": null
  },
  "config": {}
}
| Field | Type | Description |
|---|---|---|
ruleSet.webhook_key |
string |
Unique webhook identifier. Only a-z, A-Z, 0-9, -, _ |
ruleSet.allowed_methods |
string[] |
List of allowed HTTP methods |
ruleSet.auth |
object \| null |
Authentication configuration (null = no authentication) |
config |
object |
Always {} (reserved for future use) |
JSON examples by authentication type
No authentication (for testing only)
{
  "ruleSet": {
    "webhook_key": "test-webhook",
    "allowed_methods": ["POST"],
    "auth": null
  },
  "config": {}
}
Header authentication
{
  "ruleSet": {
    "webhook_key": "fire-alerts",
    "allowed_methods": ["POST"],
    "auth": {
      "type": "header",
      "header_name": "X-Webhook-Secret",
      "header_value": "my-very-long-random-secret"
    }
  },
  "config": {}
}
Basic Auth (with credential reference)
{
  "ruleSet": {
    "webhook_key": "stripe-payments",
    "allowed_methods": ["POST"],
    "auth": {
      "type": "basic",
      "username": "/**$credential(\"username\", 42)**/",
      "password": "/**$credential(\"password\", 42)**/"
    }
  },
  "config": {}
}
The
usernameandpasswordvalues are credential references stored securely. The number42is the credential ID. Do not paste the username/password as plain text directly in the JSON.
JWT authentication
{
  "ruleSet": {
    "webhook_key": "front-door-sensor",
    "allowed_methods": ["POST", "GET"],
    "auth": {
      "type": "jwt",
      "jwt_secret": "my-shared-secret",
      "jwt_algorithm": "HS256"
    }
  },
  "config": {}
}
How the external system calls depending on the auth type
Header
POST /api/netsocs/automation/webhooks/fire-alerts HTTP/1.1
Host: your-instance.netsocs.com
Content-Type: application/json
X-Webhook-Secret: my-very-long-random-secret

{ "sensor": "zone-3", "level": "critical" }
Basic Auth
POST /api/netsocs/automation/webhooks/stripe-payments HTTP/1.1
Host: your-instance.netsocs.com
Authorization: Basic dXN1YXJpbzpjb250cmFzZW5hCg==
Content-Type: application/json

{ "event": "payment.succeeded", "amount": 1500 }
JWT
POST /api/netsocs/automation/webhooks/front-door-sensor HTTP/1.1
Host: your-instance.netsocs.com
Authorization: Bearer eyJhbGciOiJIUzI1NiJ9...
Content-Type: application/json

{ "door_id": "north-door", "status": "open" }
Quick guides (recipes)
Recipe A — "When Stripe confirms a payment, trigger an action"
- Webhook Key:
stripe-payments - Allowed Methods:
POST - Auth:
Headerwith theStripe-Signatureheader and your Stripe webhook secret - Action: send email / create record / update status
Recipe B — "Internal script that notifies when a file is processed"
- Webhook Key:
file-processed - Allowed Methods:
POST - Auth:
JWT(the script signs the token with the shared secret) - Action: Telegram notification / audit log
Recipe C — "External alarm system that fires an automation"
- Webhook Key:
external-alarm - Allowed Methods:
GET,POST - Auth:
HeaderwithX-Alarm-Token - Action: activate siren / send SMS / change object state
Recipe D — "Quick test from the browser or Postman"
- Webhook Key:
dev-test - Allowed Methods:
GET,POST - Auth:
None(development environment only) - Action: log / internal notification
- Once validated, configure authentication before promoting to production
Internal references (to locate it in the editor)
- Node key:
webhook_trigger - Class:
trigger - Required fields:
webhook_key(mandatory),allowed_methods(default:["POST"]) - Supported authentication:
none,header,basic,jwt - Endpoint URL:
{origin}/api/netsocs/automation/webhooks/{webhook_key}