Netsocs Site Manager
Netsocs Site Manager is the software component installed at each physical site of the deployment. It acts as the local integration point between field devices and the Netsocs platform, autonomously managing communication, driver lifecycle, and connectivity with the central hub.
Overview
The Site Manager handles drivers: software modules that implement the communication protocols required by each device (cameras, sensors, control systems, and others) to integrate with the platform. Its responsibilities include installing, starting, monitoring, and automatically restarting these modules in the event of a failure.
Unlike a centralized integration model, the Site Manager runs directly at the site, close to the hardware. This approach reduces latency, ensures continuous operation during momentary cloud connectivity outages, and simplifies the management of local configuration.
Capabilities
From the Site Manager interface, you can:
- View installed drivers and their current execution status.
- Install or uninstall drivers from the official repository or by uploading a local file.
- Configure the hub address and access credentials, which are automatically propagated to all drivers.
- Monitor the connection status with the hub in real time.
- Manage the site's Video Engine (deprecation in progress).
Installation
The installation method varies depending on the deployment environment. This guide assumes you are using the preconfigured Site Manager installation included in any Netsocs Docker deployment.
Ubuntu
To install the Site Manager on Ubuntu, run the following commands in the terminal:
1. Download the installer:
wget https://netsocs-public-drivers-repository.s3.us-east-1.amazonaws.com/NetsocsDriverInstaller.zip
2. Unzip the file:
unzip NetsocsDriverInstaller.zip
3. Install the package with dpkg:
sudo dpkg -i NetsocsDriverInstaller.deb
Note: If
dpkgreports missing dependencies, run the following to resolve them automatically:sudo apt-get install -f
Once the installation is complete, continue with the Initial Configuration section of this guide.
Initial Configuration
Once installed, the Site Manager is available on port 3197 of the host machine over HTTP. To access the configuration interface, open a browser and enter the following address:
http://<SERVER-IP>:3197
The following configuration screen will appear:
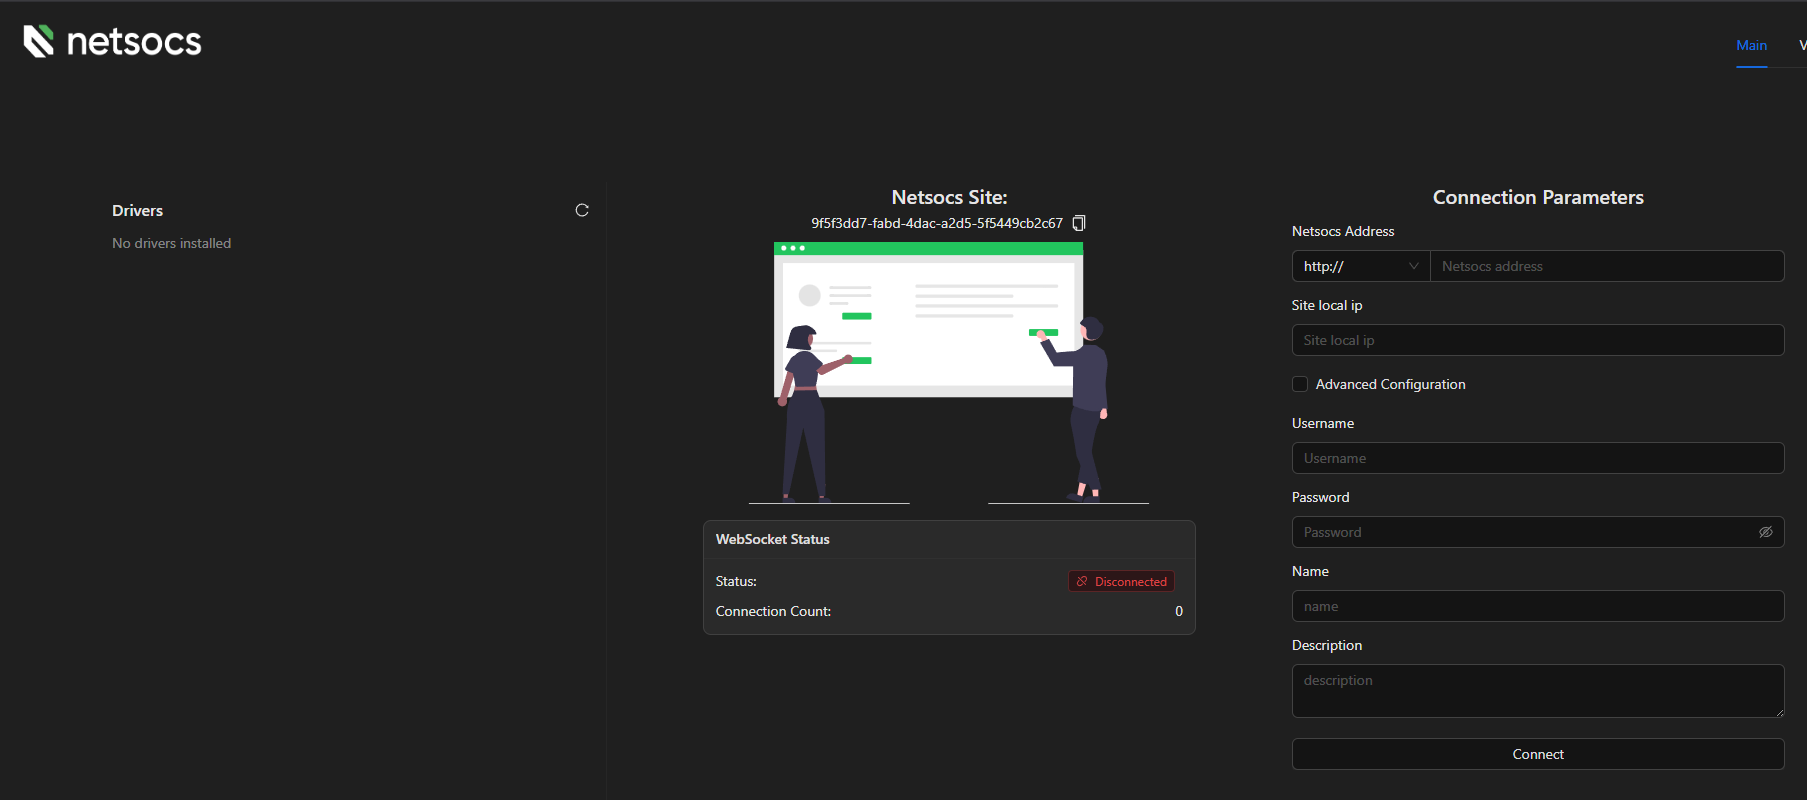
Each available field is described below.
Netsocs Address
Address of the Netsocs instance this site should connect to.
| Field | Description |
|---|---|
Protocol (http:// / https://) |
Connection scheme. Use https:// if the Netsocs instance has an SSL certificate; otherwise, select http://. |
| Address | IP address or domain name of the Netsocs instance. Do not include the protocol in this field — select it using the dropdown on the left. |
Example: 192.168.1.100 or mycompany.netsocs.com
Note: The address must be complete and valid. If the field is empty or contains only the protocol, the configuration will not be applied.
Site Local IP
Local IP address of the machine where Site Manager is installed. The hub uses this address to identify and reach this site within the local network.
Example: 192.168.1.50
Advanced Configuration (optional)
Enabling this option reveals the following additional field:
| Field | Description |
|---|---|
| Extra URI | Path appended to the end of the hub address. Use this only if the Netsocs platform is exposed under a custom path rather than the server root. Default value: /api/netsocs/dh. Do not modify this field unless your administrator specifies a different path. |
Username
Username that the Site Manager uses to authenticate with the Netsocs platform. This must correspond to an account with site integration permissions, created in advance within the platform.
Password
Password associated with the specified user. The value is hidden while typing; use the eye icon to reveal it temporarily.
Name
Name that will identify this site within the Netsocs platform. It is displayed in the hub interface to distinguish this site from other registered sites. A descriptive, unique name is recommended.
Example: North Plant, Central Building
Description
A brief description of the site. It helps hub administrators quickly identify the function or location of this site within the installation.
Example: Floor 3 — Production area, line A
Connect Button
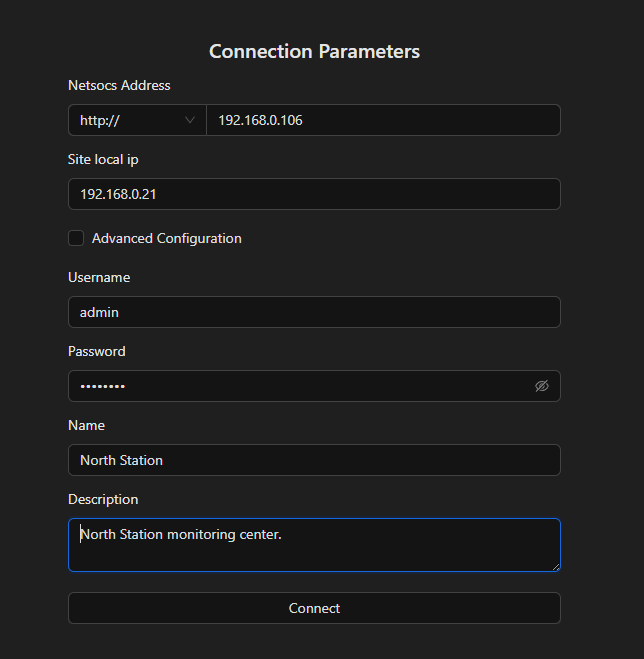
Once all fields are complete, press Connect. The Site Manager will automatically execute the following steps:
- It authenticates with Netsocs using the provided credentials and obtains an access token.
- It saves the configuration and propagates it to all installed drivers; running drivers are restarted to apply the new parameters.
If any field is invalid or incomplete, an error message will appear before any changes are applied.
Verifying the Connection
After pressing Connect, the interface will display a confirmation indicating that the connection process has started:
The following confirmation message will then appear:

After a few seconds, the status indicator will change to Connected in green, confirming that the connection to the hub has been established successfully:
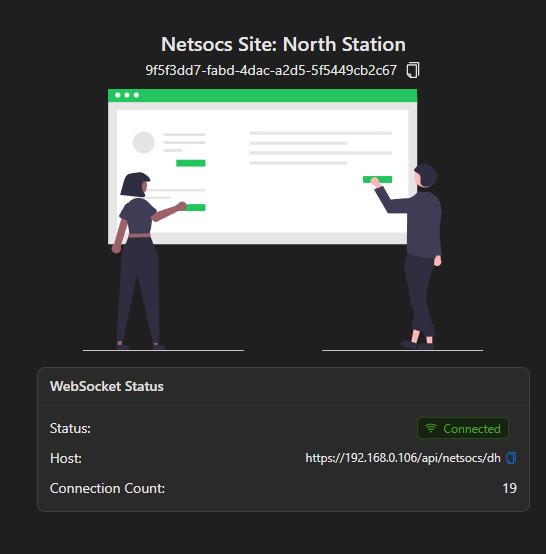
Note: If the status remains at Connecting after several seconds, reload the page and wait again. In most cases, the connection completes in under 30 seconds.
Verification in the Platform
Once the connection is established, the newly configured site will appear in the list of registered sites on the platform. To verify this, navigate to Settings → Technologies → Add Integration:
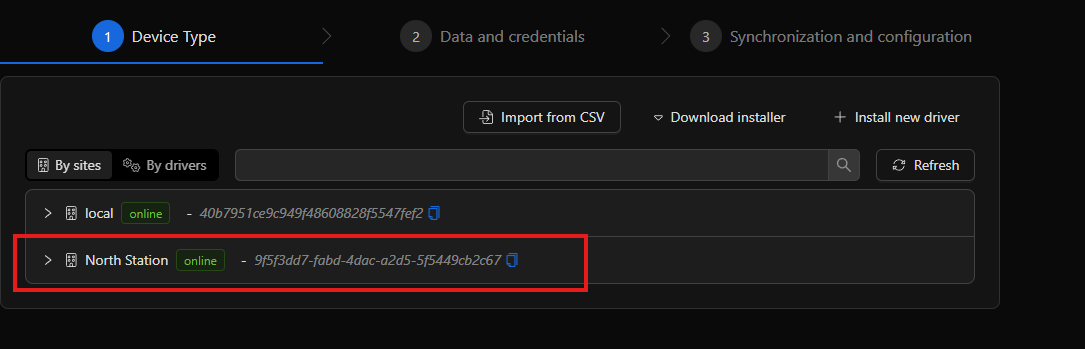
Important: Check your license for the maximum number of permitted sites before registering new sites on the platform.
The site has been configured successfully. The next step is to install a driver to begin integrating the devices at this site.