Creating Your First Automation
This guide will walk you through the process of creating your first automation in Netsocs Synergy. We will use a simple and safe test flow: a manual trigger that waits for a few seconds and then takes an active image capture (snapshot) from a video camera.
Test Flow Objective
Create a logical rule that allows you to: 1. Start the flow manually via a test button in the interface. 2. Delay execution for 10 seconds. 3. Request a real-time image capture from a video camera and obtain the URL of the resulting image file.
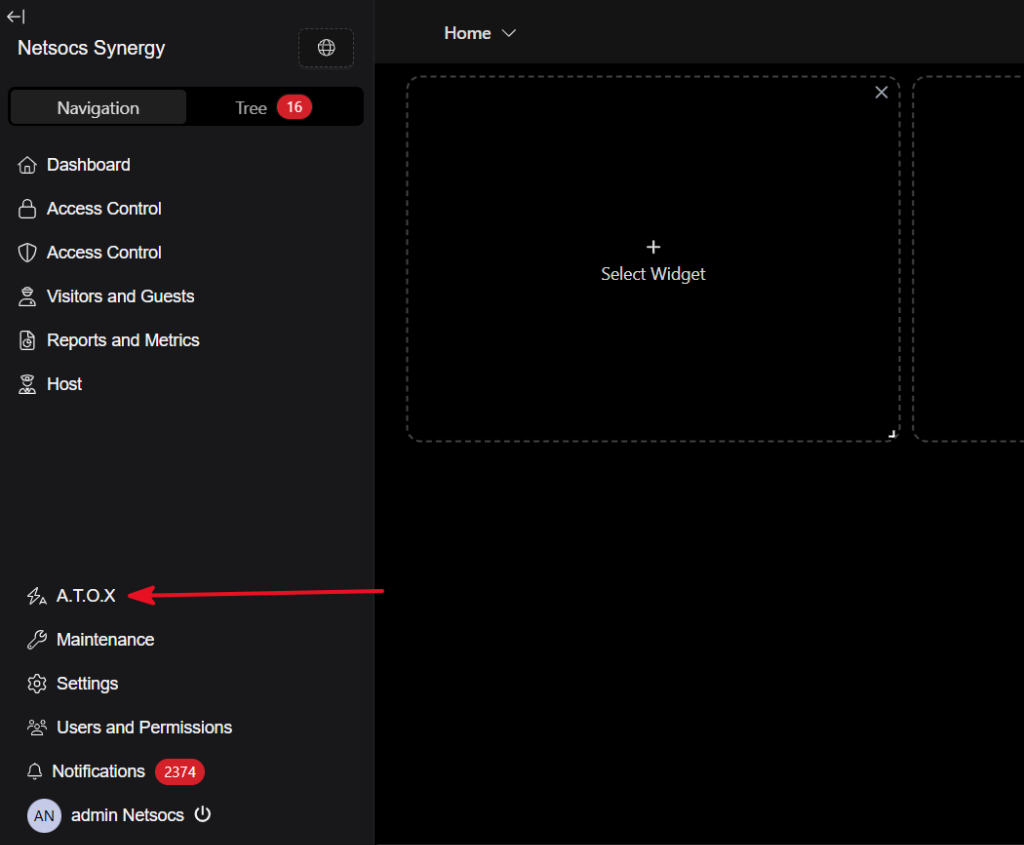
Step 1: Open the Automation Editor
- Go to the left sidebar menu and click on the automations section (labeled as A.T.O.X).
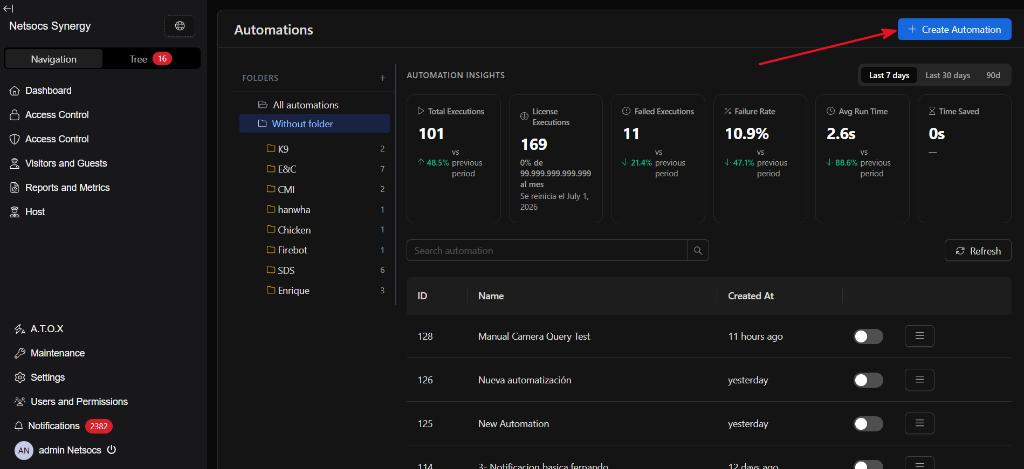
- Click the
+ Create Automationbutton in the upper right corner to open a new canvas.
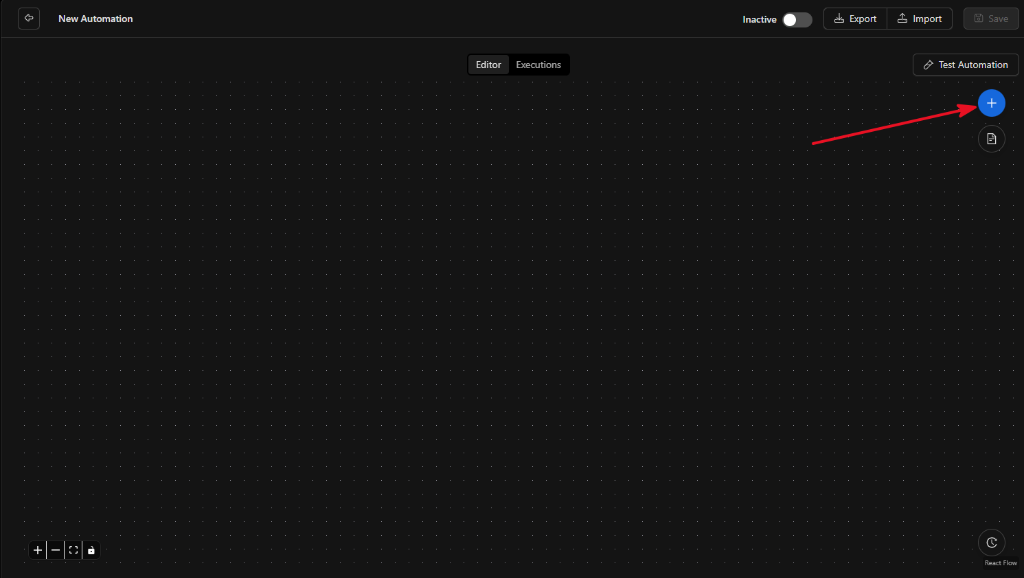
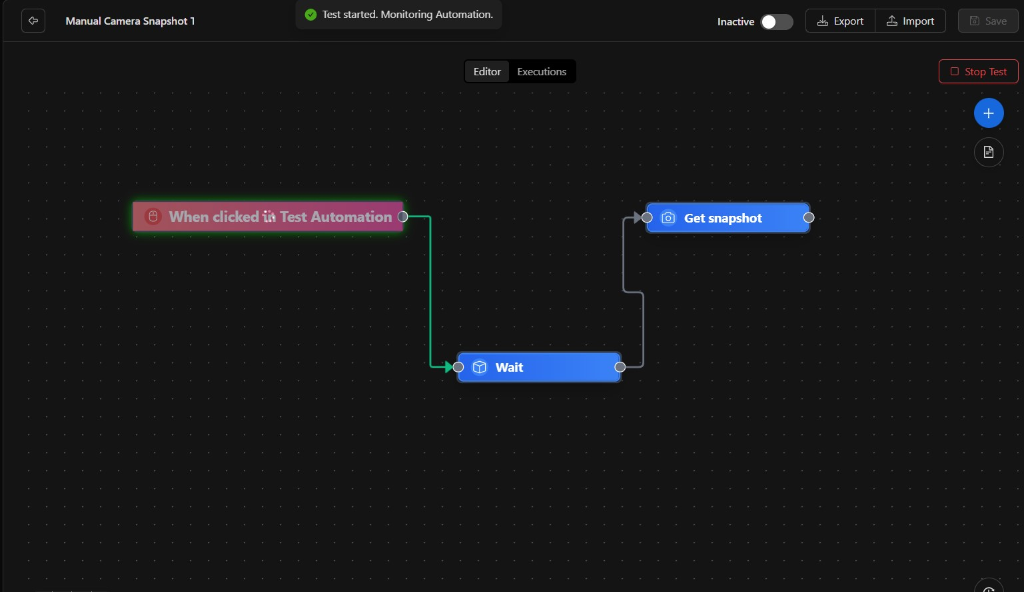
Step 2: Add and Connect Nodes
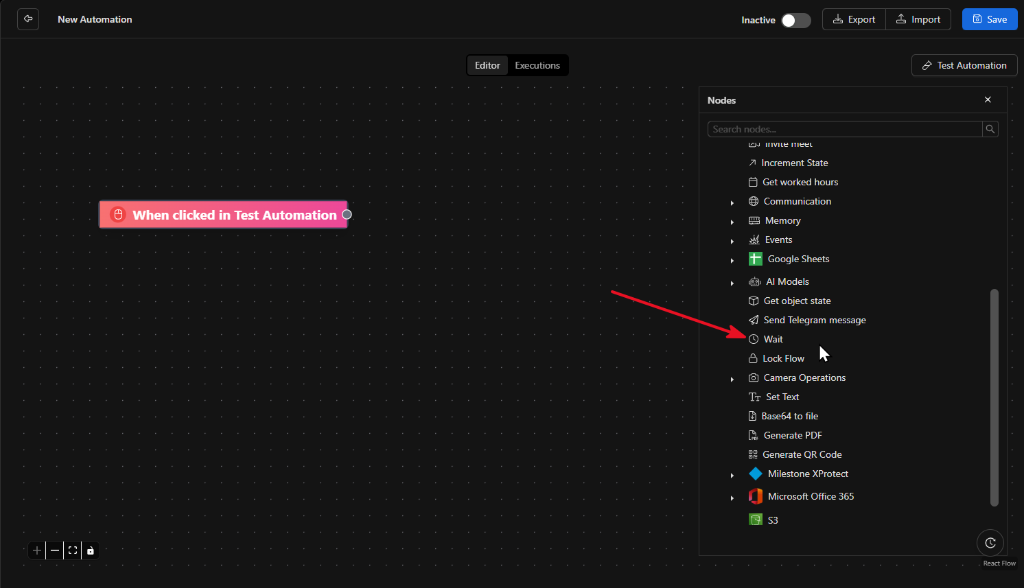
- Open the node library by clicking the blue
+button in the upper right corner of the canvas.
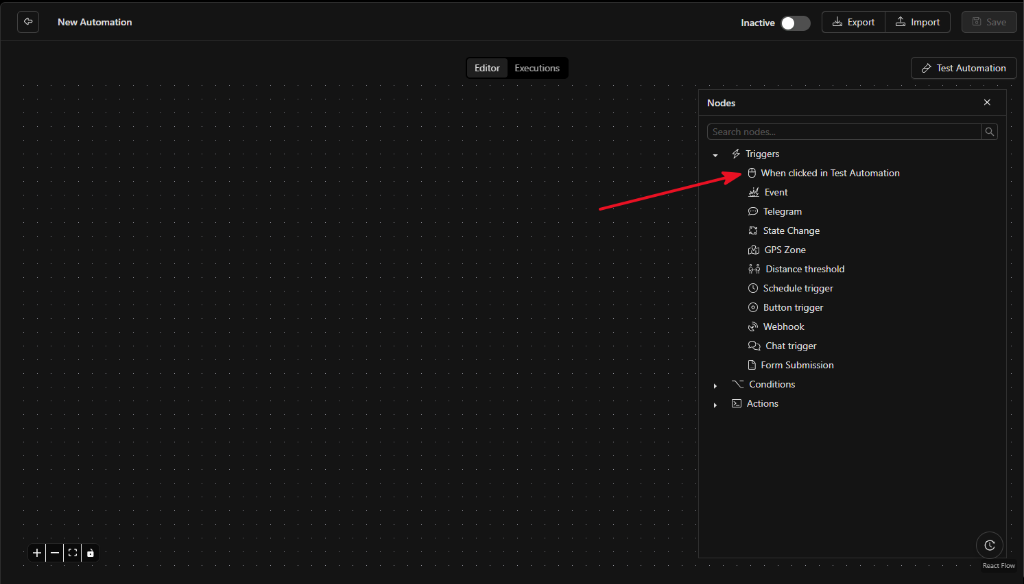
- Add the Trigger:
- Go to the Triggers section.
- Drag the
When clicked in Test Automationnode onto the canvas. This node allows you to manually activate the flow for testing purposes.
- Add the Wait Action:
- Go to the Actions section.
- Drag the
Waitnode onto the canvas.
- Add the Capture Action:
- Go to the Actions section.
- Drag the
Get snapshotnode onto the canvas.
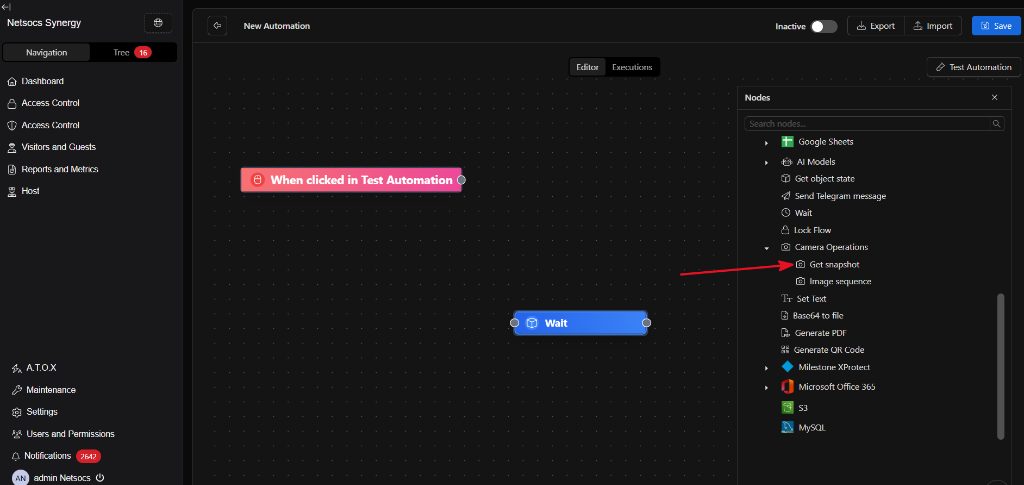
- Connect the Nodes:
- Click on the circular output connector of
When clicked in Test Automationand drag it to the input connector ofWait. - Click on the circular
continueconnector ofWaitand drag it to the input connector ofGet snapshot.
Step 3: Configure Nodes
Each node requires configuration for the flow to function correctly.
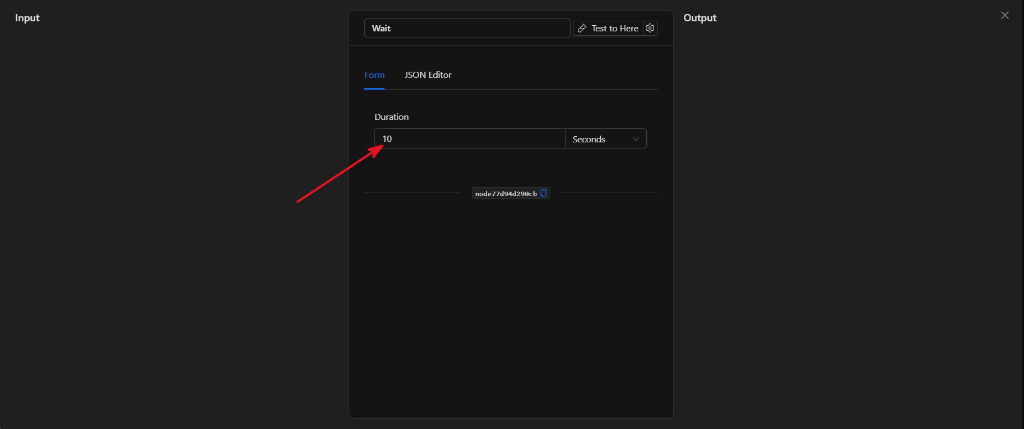
- Configure the
WaitNode: - Double-click the
Waitnode on the canvas. - In the
Durationfield, enter10and make sure the unit is set toSeconds. - Close the configuration panel by clicking the
Xin the upper right corner.
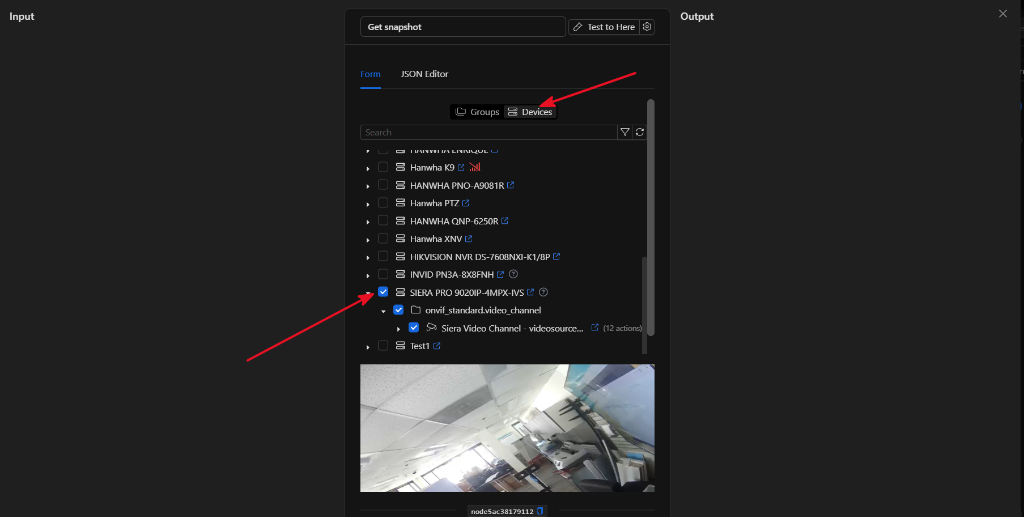
- Configure the
Get snapshotNode: - Double-click the
Get snapshotnode on the canvas. - Make sure to click the
Devicestab at the top of the selector panel. - In the device tree (
Objectfield), search for the camera you want to use. (Note: You can use any camera device available in your installation, but for this test we will select the cameraSIERA PRO 9020IP-4MPX-IVS). - Make sure to check the box next to the video channel of the selected camera.
- Close the configuration panel by clicking the
Xin the upper right corner.
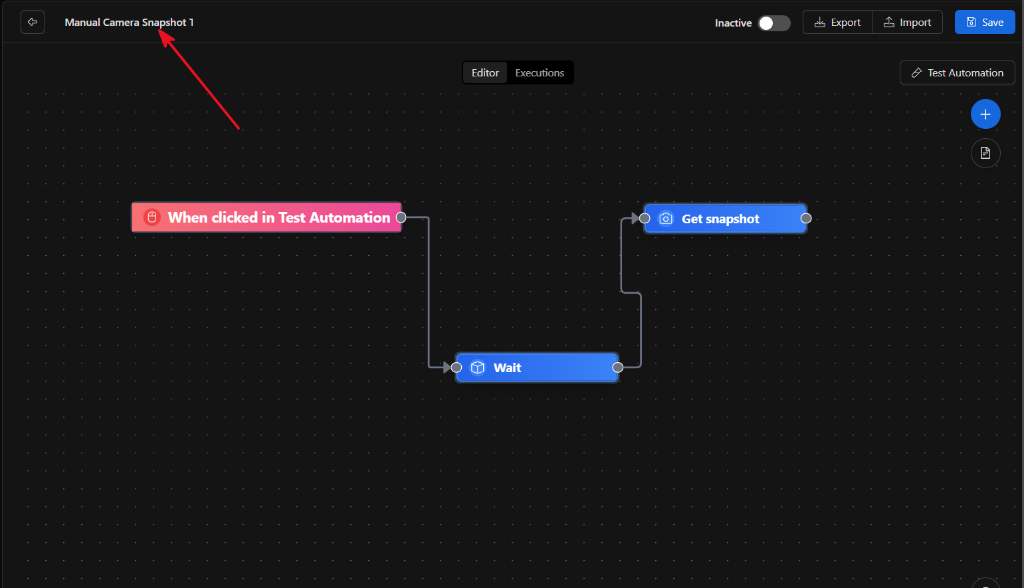
Step 4: Name and Save
- Click on the default title "New automation" in the upper left of the canvas and type a descriptive name (for example:
Manual Camera Snapshot Test).
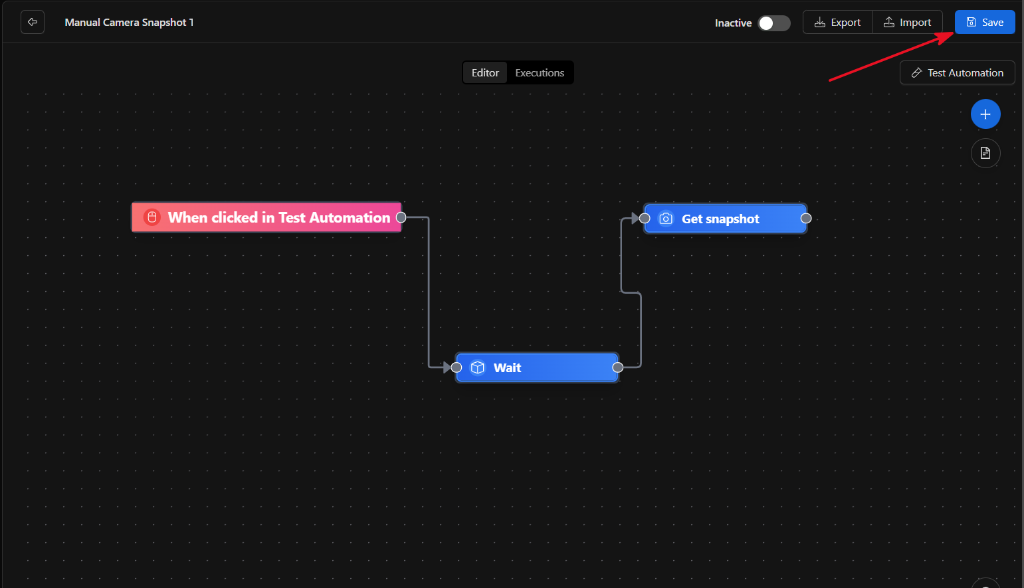
- Click the
Savebutton in the top right of the canvas.
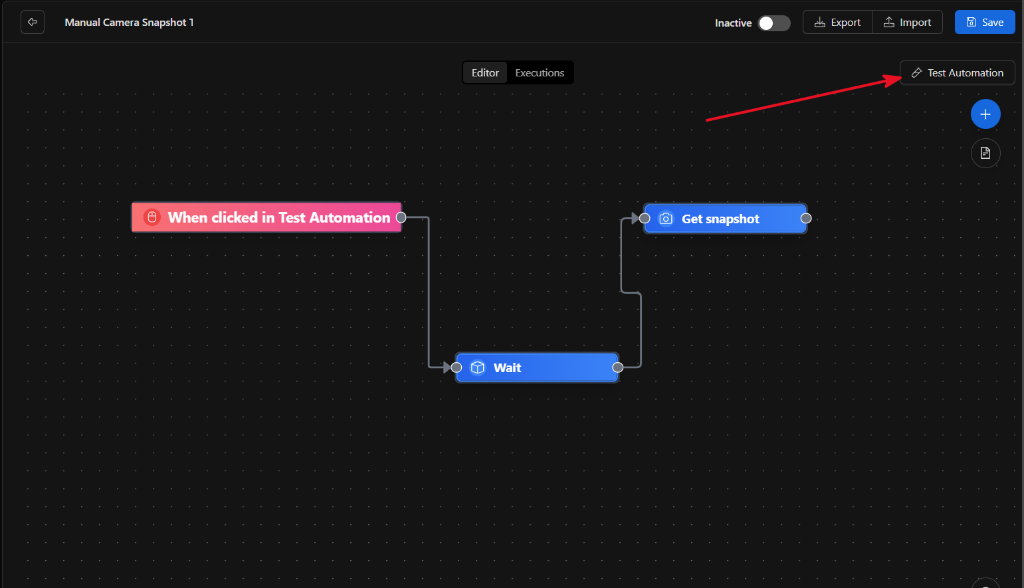
Step 5: Test and Analyze Results
- With the automation saved and in an
Inactivestate, click theTest Automationbutton in the top right.
- Switch to the
Executionstab in the top bar of the editor to view the history. - Wait 10 seconds for the execution to finish. You will see that the nodes are marked with bright green borders, confirming the successful logical execution of the flow.
- To view what data the system retrieved:
- Double-click the
Get snapshotnode inside the executed flow. - In the
Outputpanel on the right side of the screen, you will see the real-time result of the call with the URL of the generated capture:
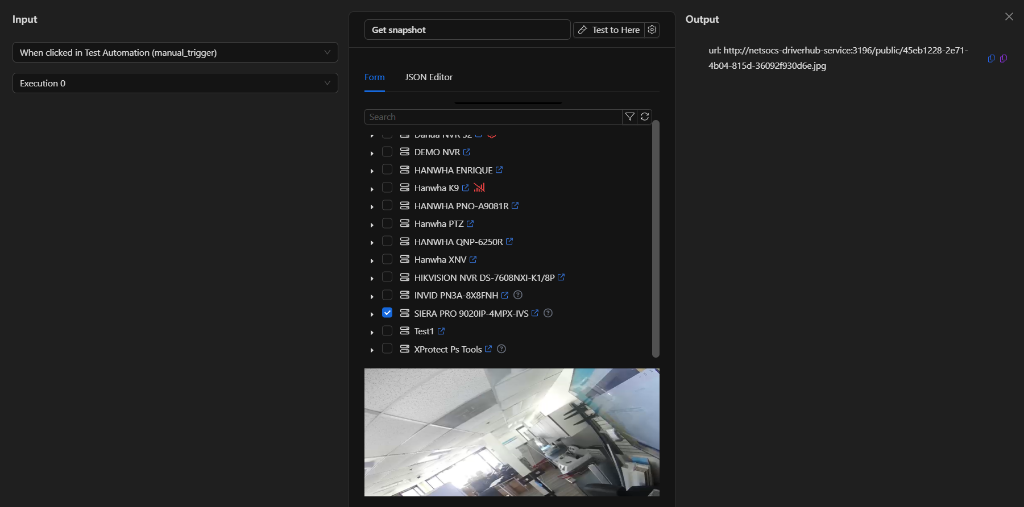
{
  "url": "http://netsocs-driverhub-service:3196/public/45cb1228-2e71-4b04-815d-36092f930d6e.jpg"
}
Special Case: Accessing the Snapshot URL (Internal vs. Public Routing)
The URL returned by the node in the url field uses the internal network addressing of the installation's Docker environment: http://netsocs-driverhub-service:3196/public/45cb1228-2e71-4b04-815d-36092f930d6e.jpg
This host (netsocs-driverhub-service:3196) is only accessible internally within the Docker private container network, so an external user or their web browser will not be able to view the image using this direct address.
To view and access the captured image publicly, the internal section must be replaced by the public external routing path of your instance's domain (e.g., https://demo02.netsocs.com/):
- Internal route (inside Docker):
http://netsocs-driverhub-service:3196/public/ - Public route (user access):
https://<instance-domain>/api/netsocs/dh/public/
Therefore, the final URL to view the captured image in this example from the internet would be: https://demo02.netsocs.com/api/netsocs/dh/public/45cb1228-2e71-4b04-815d-36092f930d6e.jpg
Result
The test automation has been successfully created and validated in the Netsocs Synergy visual editor. With this conceptual foundation learned, you can now:
- Configure automatic triggers based on real hardware events (for example, sensor state changes or alarms).
- Design complex conditional logic using branches and date or time filters.
- Program physical actions on your devices, such as activating relays, moving PTZ cameras, or sending alerts via messaging channels (Telegram, WhatsApp, etc.).