Documentation: Modify Object State Node
Overview
The Modify Object State action node allows you to change the main state and/or specific properties of any object or device registered in the platform (such as sensors, lights, locks, alarm panels, etc.) during flow execution.
When this action is executed, the changes propagate immediately to the core of the system. This allows the new state and its modified properties to be reflected in real-time on dashboards, Synoptics, Maps, and centrally within the Configuration Module (under Settings ▸ Objects), as well as being recorded in the system's event log.
When to use this node?
Use this node when you need to:
- Programmatically change the operational state of a device (for example: marking a temperature sensor as
ACTIVEor an alarm panel asARMED). - Update secondary properties or telemetry values of an object manually or dynamically (for example: setting a thermostat's target temperature to
21or updating a sensor's battery level). - Synchronize virtual states based on environmental conditions (for example, changing a virtual zone's state to
ALERTwhen multiple physical sensors detect motion). - Propagate state changes so that other automation flows or dashboards can react to them.
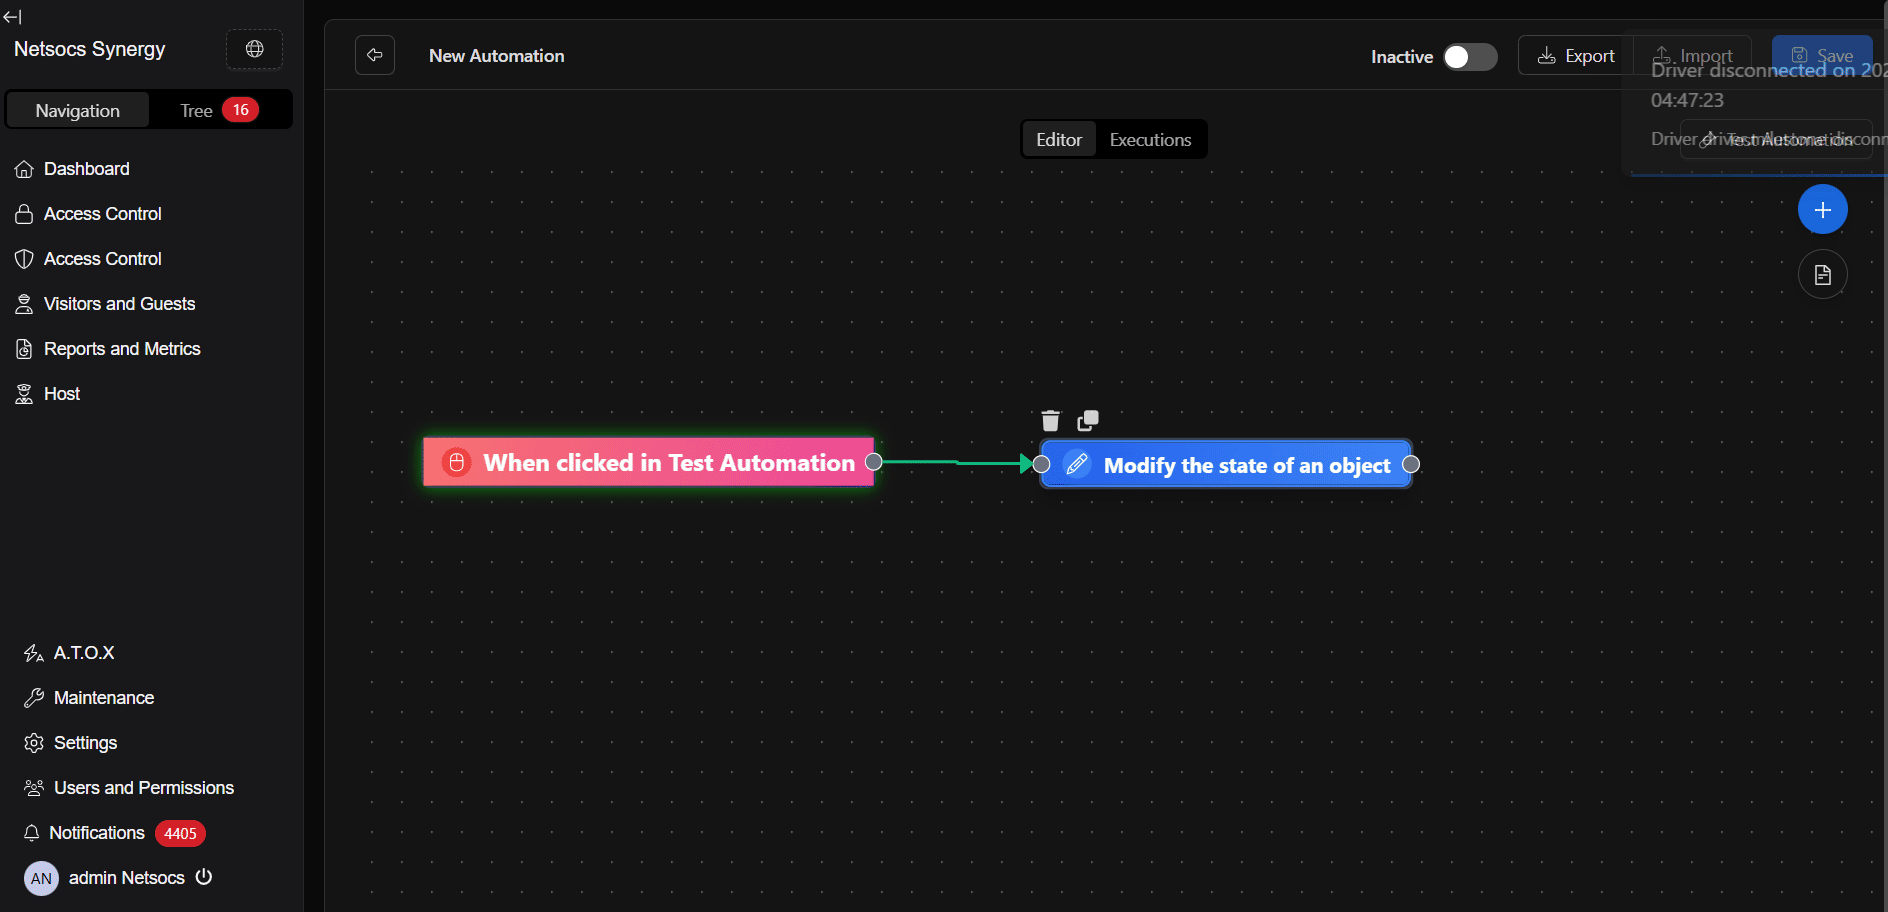
Node Configuration
The node has two configuration tabs at the top: Form and JSON Editor.
Form View
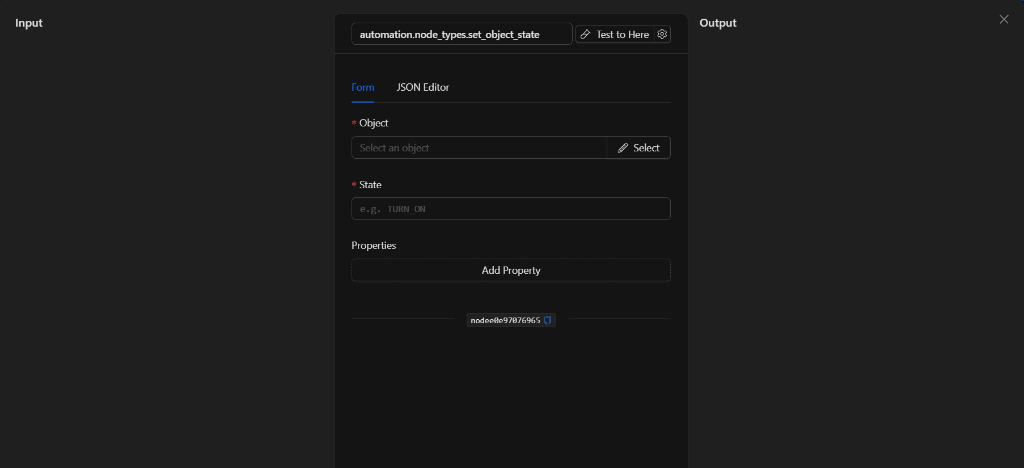
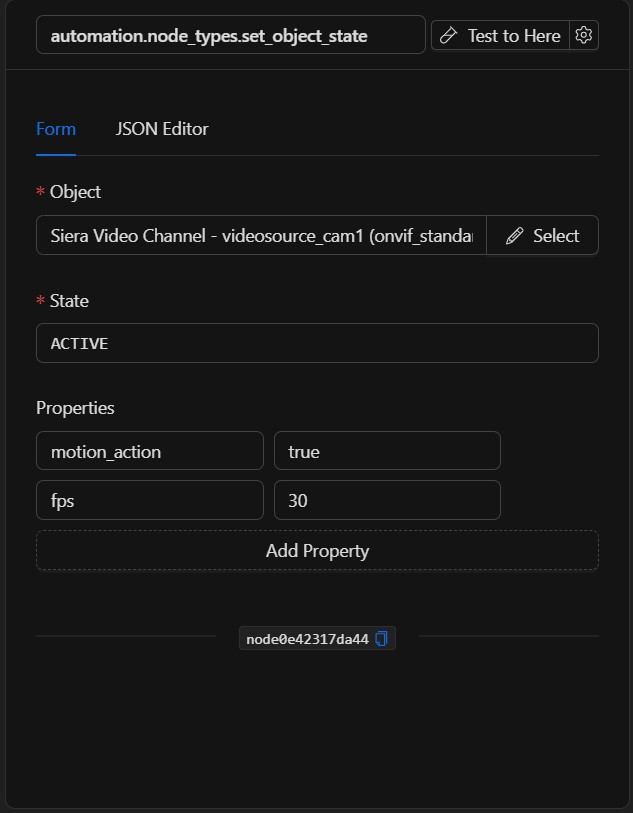
1. Object *Required
Allows you to select the specific object whose state and/or properties will be modified.
- Click the Select button to open the system's object selector modal.
- In the modal, you can search and filter by name or object type to make your selection.
- Once selected, the object's name will be displayed in the interface, and its unique ID will be associated internally with the node.
2. State *Required
Defines the new value of the main state that will be assigned to the object.
This field supports two configuration methods:
- Static Value (Fixed): Enter the state text directly. This value depends on the type of object you are modifying (for example:
ONorOFFfor switches,ACTIVEorINACTIVEfor sensors,COOLINGfor air conditioners,ARMED_AWAYfor alarm panels). - Dynamic Value (Template Expressions): If you type double curly braces
{{, the autocomplete menu for the Netsocs template helper will be activated. This allows you to:- Inherit states from other nodes: For example, using
{{trigger.state.state}}(which represents the state value of the device that triggered the automation) to replicate its state in the current object. - Transform values at runtime: You can use helper functions like
{{lower(trigger.state.state)}}to convert the incoming state to lowercase (for example, if the trigger sends"ACTIVE", the function will convert it to"active"before saving) or other text functions liketrim,upper,replace, etc.
- Inherit states from other nodes: For example, using
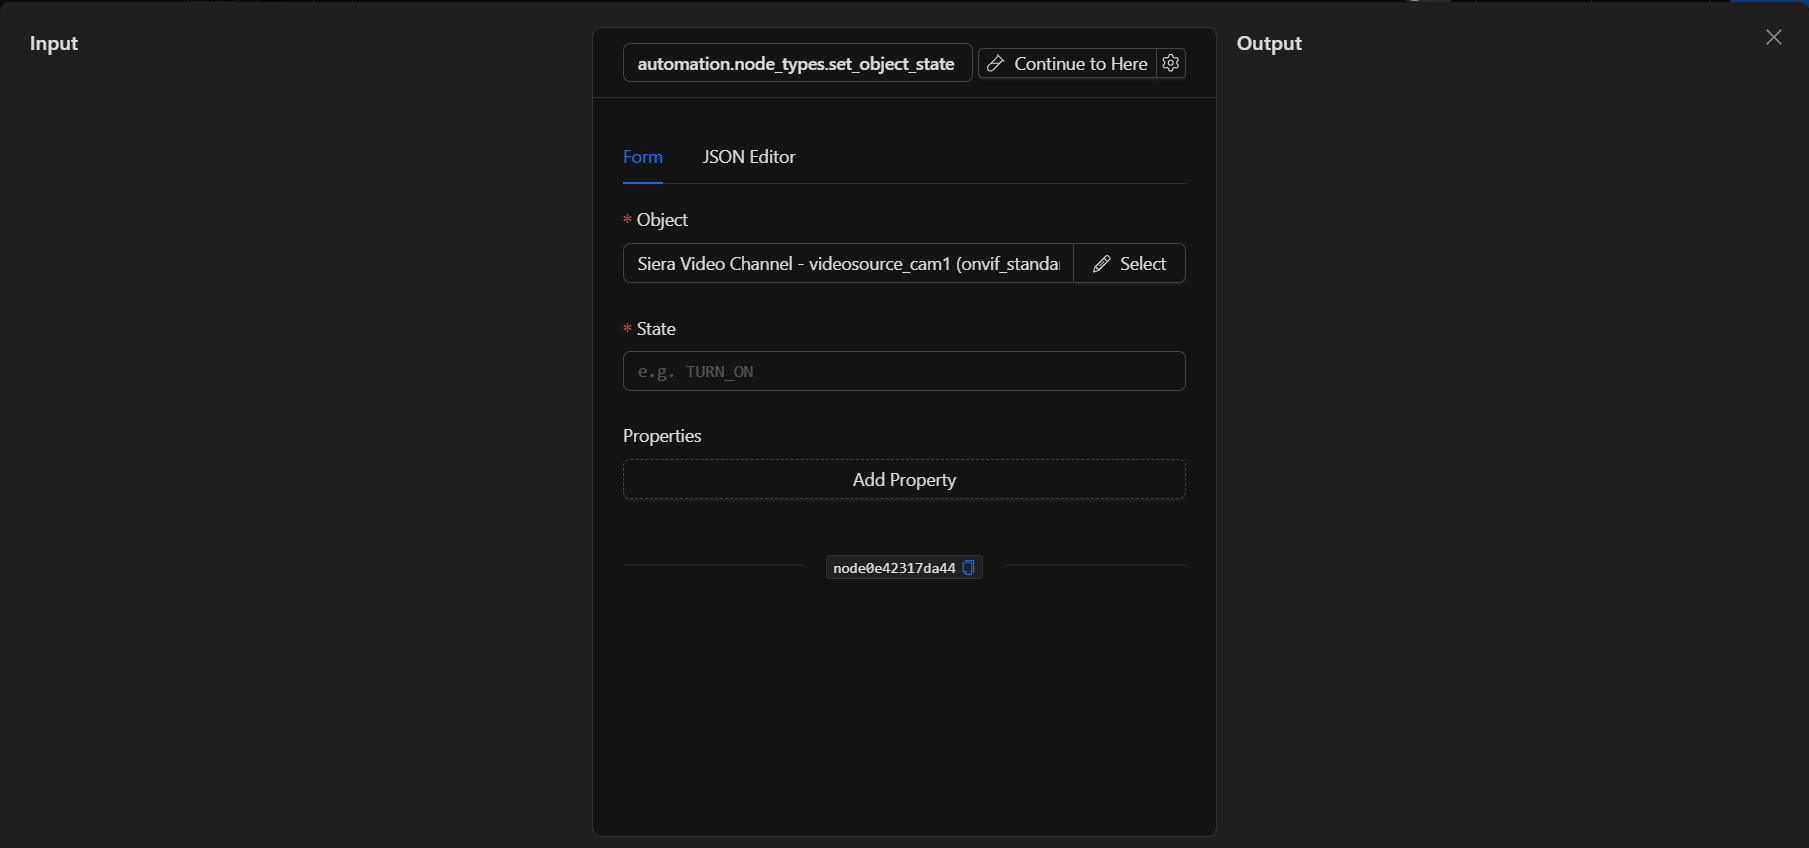
3. Properties *Optional
Allows you to add or edit additional properties or metadata of the object's state.
- Click the Add Property button to display a new key-value row.
- Key: The name of the property you want to create or modify (for example: temperature, humidity, battery_level).
- Value: The value to be assigned to that property. This field supports static values and template expressions.
JSON Editor View
In the JSON Editor tab, you can view and directly edit the structured code representation of the node. This is useful for quick configurations, parameterizing with complex dynamic variables, or copying configurations between nodes:
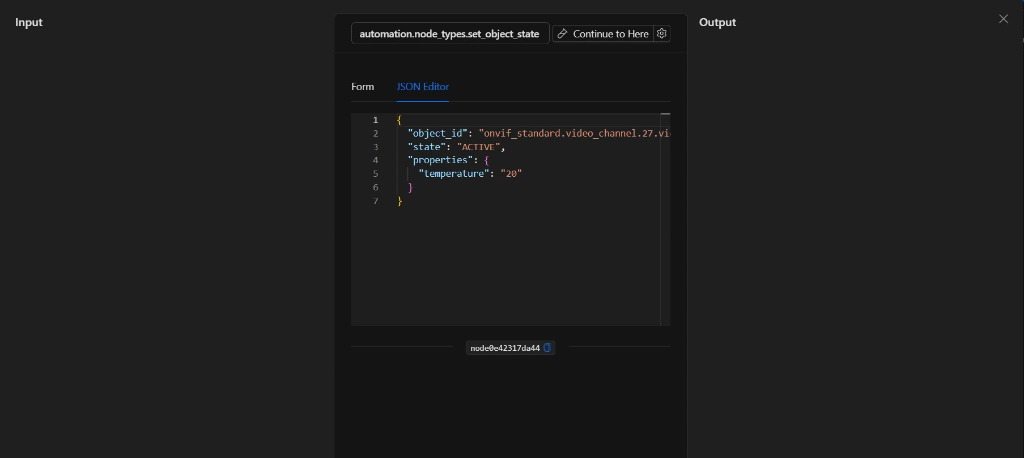
JSON Structure (Input parameters)
The following details the JSON structure generated in the JSON Editor tab when configuring the node:
{
  "object_id": "onvif_standard.video_channel.27.videosource_cam1",
  "state": "ACTIVE",
  "properties": {
    "temperature": "20"
  }
}
JSON Fields
| Field | Type | Description |
|---|---|---|
object_id |
string | Unique ID of the selected object in the platform. Can be a static UUID or a template expression (e.g. {{trigger.object_id}}). |
state |
string | The new main state to be applied to the object. |
properties |
object | A flat JSON object containing key-value pairs with the additional properties to be updated on the object. |
Output: Where the node's data comes from
When the action executes successfully, the node returns a response with the result of the operation in its Output panel, which can be viewed in the results drawer during testing:
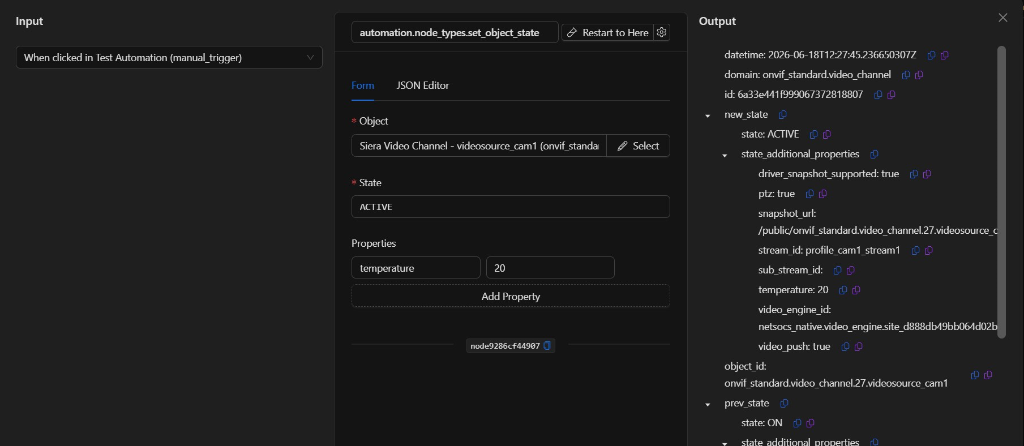
Output Example
The node's response upon completing the state modification is structured as follows:
{
  "datetime": "2026-06-18T12:27:45.236650307Z",
  "domain": "onvif_standard.video_channel",
  "id": "6a33e441f999067372818807",
  "object_id": "onvif_standard.video_channel.27.videosource_cam1",
  "new_state": {
    "state": "ACTIVE",
    "state_additional_properties": {
      "driver_snapshot_supported": true,
      "ptz": true,
      "snapshot_url": "/public/onvif_standard.video_channel.27.videosource_cam1.jpg",
      "stream_id": "profile_cam1_stream1",
      "sub_stream_id": "",
      "temperature": 20,
      "video_engine_id": "netsocs_native.video_engine.site_d888db49bb064d02b94bed64ecf709f7",
      "video_push": true
    }
  },
  "prev_state": {
    "state": "ON",
    "state_additional_properties": {
      "driver_snapshot_supported": true,
      "ptz": true,
      "snapshot_url": "/public/onvif_standard.video_channel.27.videosource_cam1.jpg",
      "stream_id": "profile_cam1_stream1",
      "sub_stream_id": "",
      "temperature": 20,
      "video_engine_id": "netsocs_native.video_engine.site_d888db49bb064d02b94bed64ecf709f7",
      "video_push": true
    }
  }
}
Output Fields
| Field | Type | Description |
|---|---|---|
datetime |
string | Date and time when the state change was applied (in RFC 3339 format). |
domain |
string | Domain to which the modified object belongs. |
id |
string | Database ID assigned to the object. |
object_id |
string | Unique hardware ID of the modified object. |
new_state |
object | Block containing the new state data assigned to the object after execution. |
new_state.state |
string | The new main state of the object (e.g. ACTIVE, ON). |
new_state.state_additional_properties |
object | Additional properties of the object after the update, including the modified ones (e.g. temperature). |
prev_state |
object | Block containing the previous state data of the object before this modification. |
prev_state.state |
string | The previous main state of the object (e.g. ON). |
prev_state.state_additional_properties |
object | Previous additional properties of the object before the update. |
Using Output in Subsequent Nodes
To reference the results in subsequent nodes, use the node's key (node_key) in your flow:
{{node_key.new_state.state}}
{{node_key.new_state.state_additional_properties.temperature}}
{{node_key.object_id}}
{{node_key.prev_state.state}}
(Remember to replace node_key with the actual key assigned to the node on the canvas).
Usage Examples
Example 1: Update smart thermostat setting (IoT)
Use case: Change a thermostat's state to COOLING mode and set the target temperature after a high heat detection event.
- Object: Main Thermostat (
climatizacion_principal) - State:
COOLING - Properties:
- Key:
temperature_target| Value:21 - Key:
fan_speed| Value:high
Configuration JSON:
{
  "object_id": "a3b12c5d-89ef-4701-b2c3-4d5e6f7a8b9c",
  "state": "COOLING",
  "properties": {
    "temperature_target": "21",
    "fan_speed": "high"
  }
}
Example 2: Automatically arm an alarm panel
Use case: When closing hours are reached in a warehouse, set the alarm panel's state to ARMED_AWAY mode and set an exit delay.
- Object: Warehouse Alarm Panel (
panel_alarma_principal) - State:
ARMED_AWAY - Properties:
- Key:
exit_delay| Value:30 - Key:
armed_by| Value:System Automation
Configuration JSON:
{
  "object_id": "f8e7d6c5-b4a3-2109-87fe-dcba98765432",
  "state": "ARMED_AWAY",
  "properties": {
    "exit_delay": "30",
    "armed_by": "System Automation"
  }
}
Validation and Errors
The node performs automatic validations before sending the state modification request:
- Required fields validation: Checks that both
object_idandstateparameters are not empty. - Object existence: Verifies if the provided object ID exists in the platform's database.
Common Errors
| Condition | Cause / Common Solution |
|---|---|
Missing or empty object_id |
Ensure you have selected a valid object in the form or entered the "object_id" key in the JSON tab. |
Missing state |
The main state cannot be left blank. Make sure to configure a plain text value in the "State" field. |
| Object not found | The object ID is incorrect or has been deleted from the system. Confirm the object exists in the object management section. |
| Permission / Communication error | Temporary connection failure between the automation engine and the system core. Try running the test again. |
Best Practices
- Name the node descriptively: Rename the node on the canvas to something readable (e.g., "Activate Living Room Thermostat") to easily identify it when using its variables in subsequent nodes.
- Use dynamic templates: In dynamic flows, you can assign the
object_idusing{{trigger.object_id}}so that the automation works generically for multiple devices. - Monitor in configuration section: To verify if the changes were successfully applied outside the automation editor, go to Settings ▸ Objects and search for the modified object to view its updated properties.