Change an object's default icon
Every object is shown in the devices tree with a default icon based on its type. The Change default icon action lets you customize that icon and its color so an object is easier to identify at a glance.
This action is available from the context menu of any object in the tree and only affects the way that object is represented; it does not change its type, its domain or its behavior.
How to access it
- Open the Tree panel and expand Devices Tree.
- Locate the object you want to customize. For example, the
Siren0400object inside the Alarma device and thedolynk.sensor.alarm_zonedomain. - Right-click the object and select Change default icon.
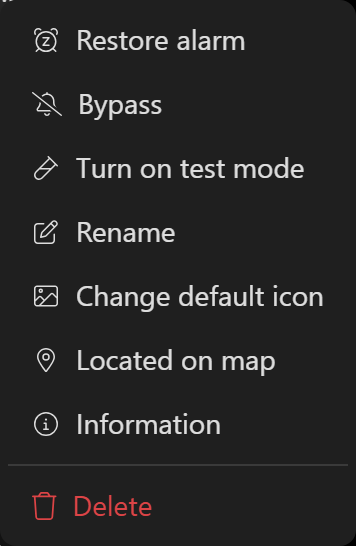
The customization dialog
Selecting the option opens the Change default icon dialog, where you will find a preview of the current icon and the tools to modify it.
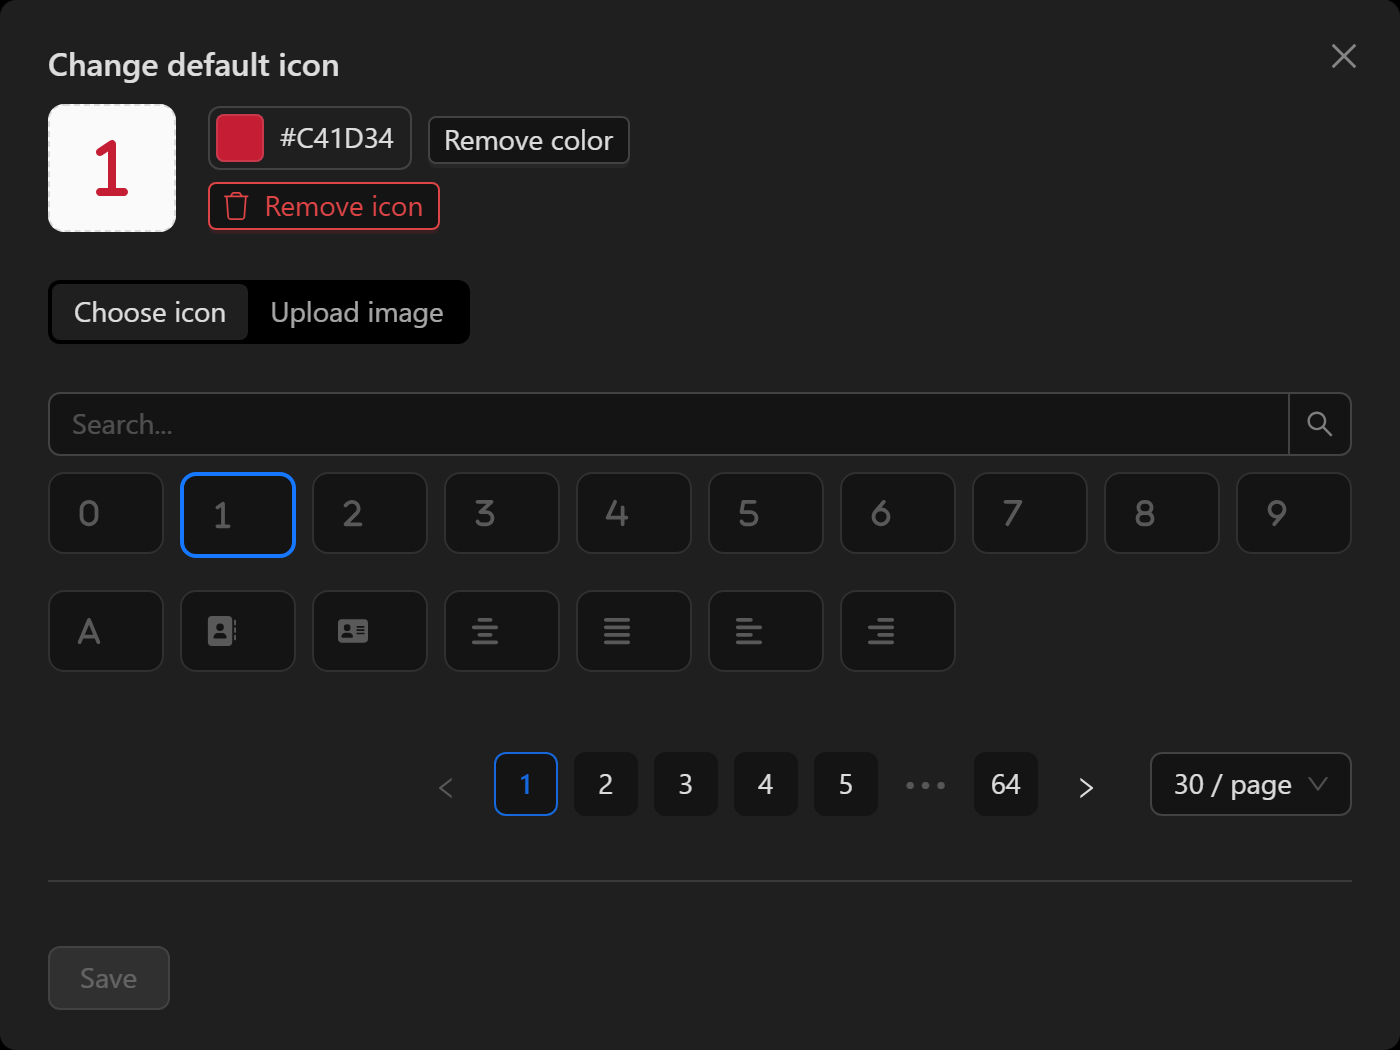
The dialog is made up of the following elements:
- Preview: shows how the object will look with the selected icon and color.
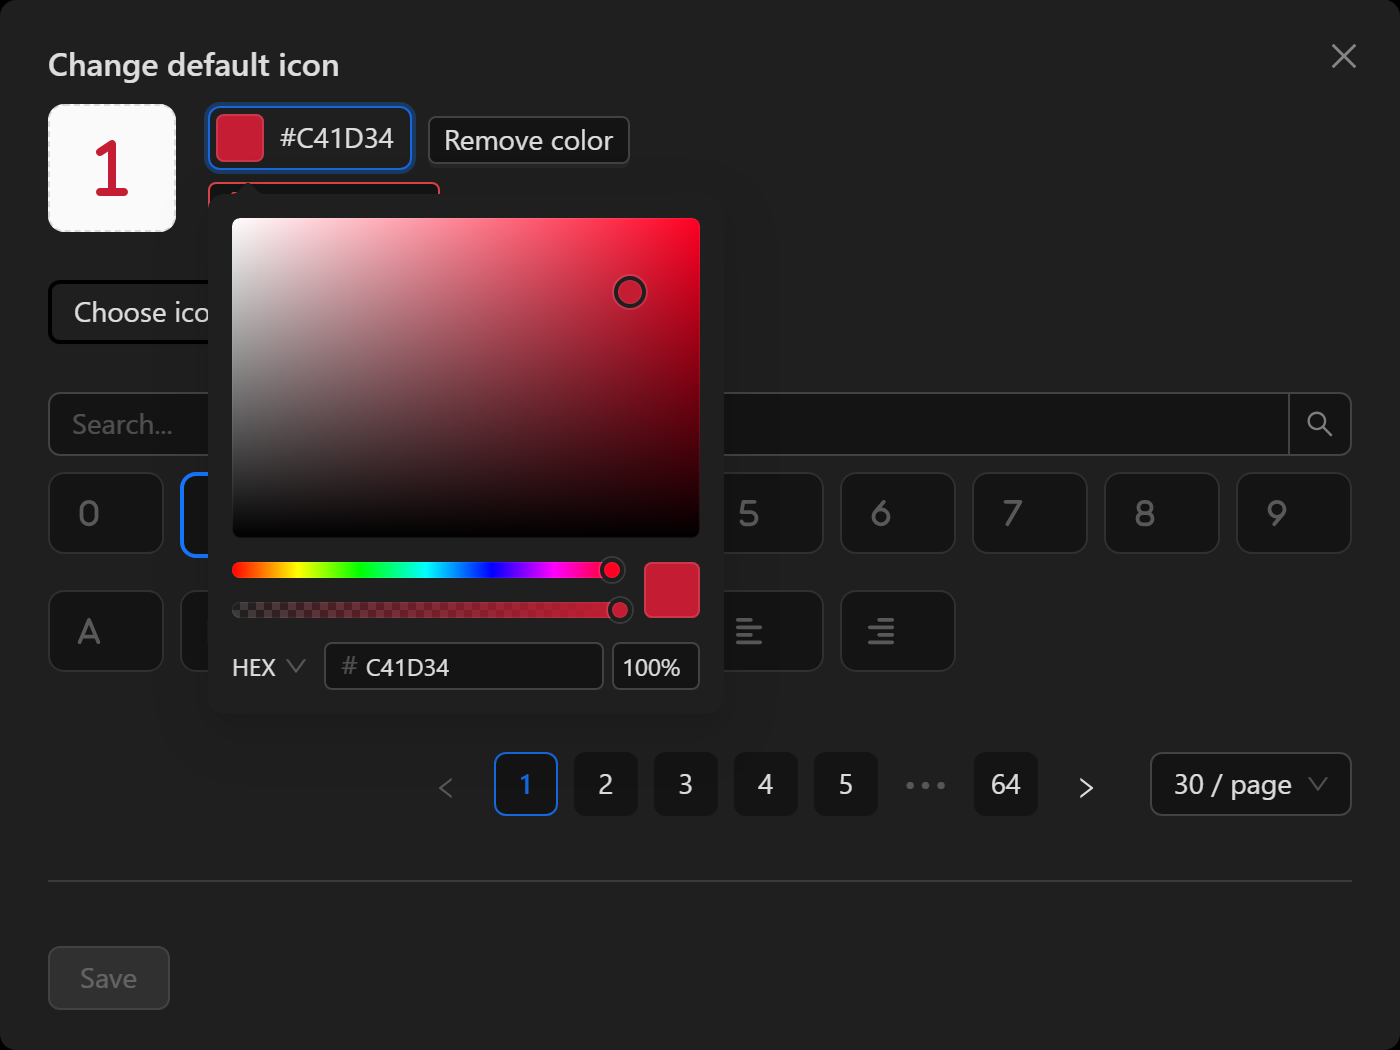
- Color: opens a color picker to tint the icon.
- Remove color: removes the applied color and returns the icon to its default appearance.
- Remove icon: removes the custom icon and restores the object type's default icon.
- Choose icon / Upload image: the two ways to define the icon (icon library or your own image).
- Save: applies the changes to the object.
Choose an icon from the library (Choose icon)
In the Choose icon tab you can search for and select an icon from the built-in library. Use the Search... field to filter by name and navigate through the result pages.
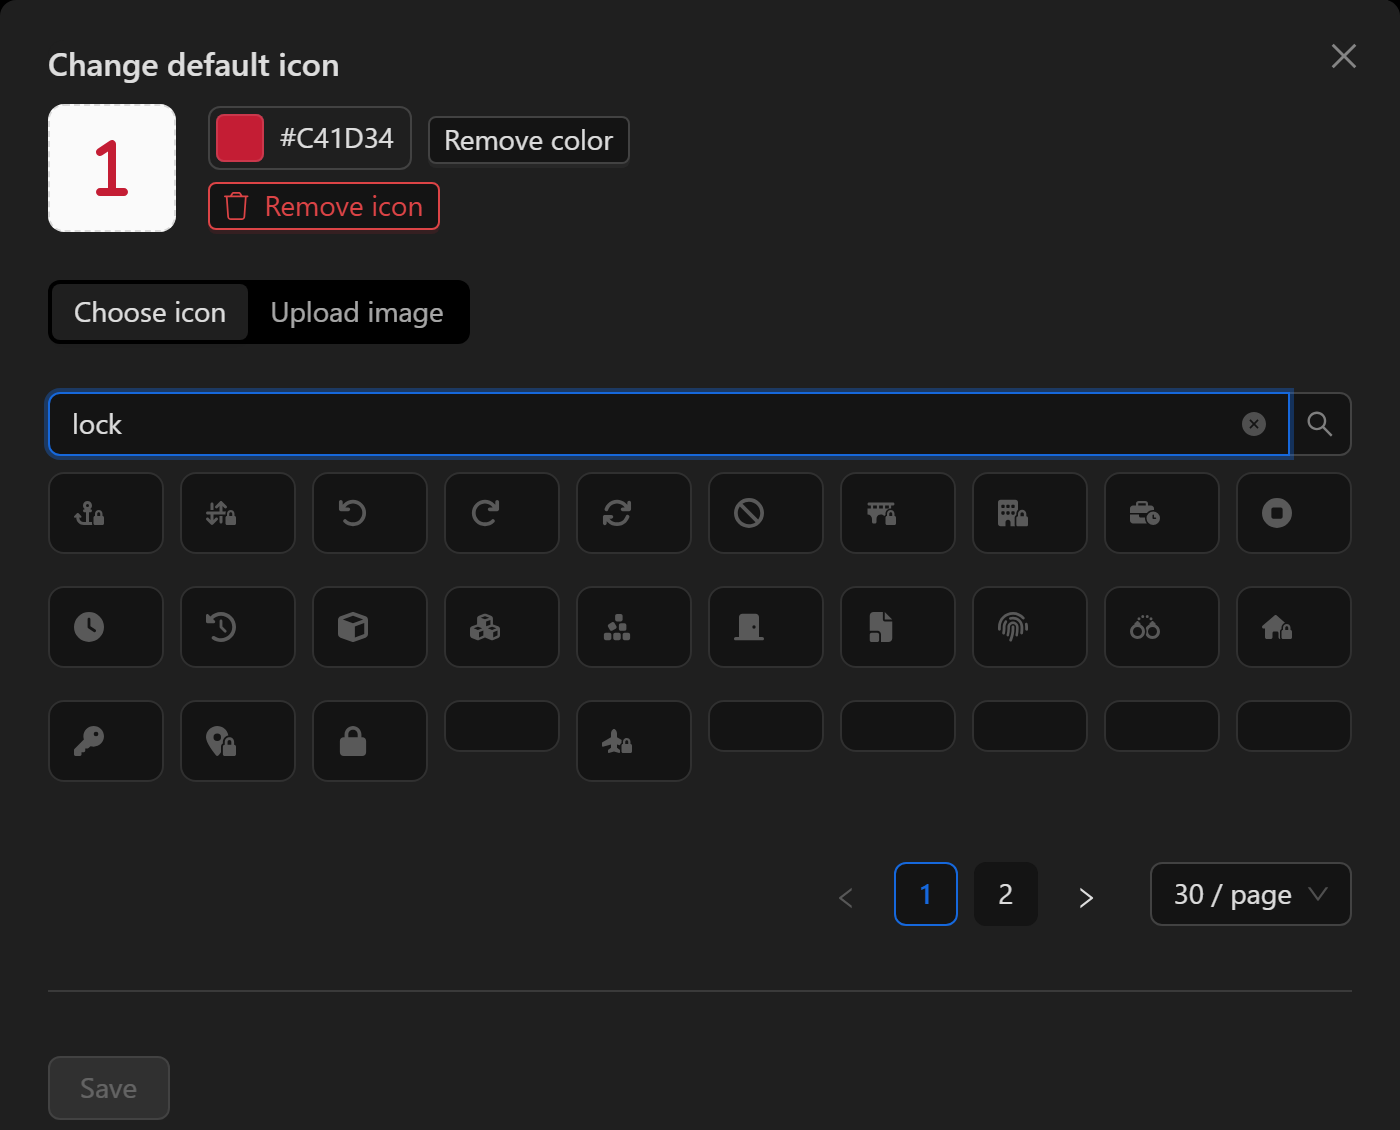
NOTE: The icon search works with English names (for example,
lock,door,camera). Terms in other languages, such ascandado(Spanish for lock), return no results.
Upload your own image (Upload image)
In the Upload image tab you can upload your own image to use as the object's icon, instead of choosing one from the library.
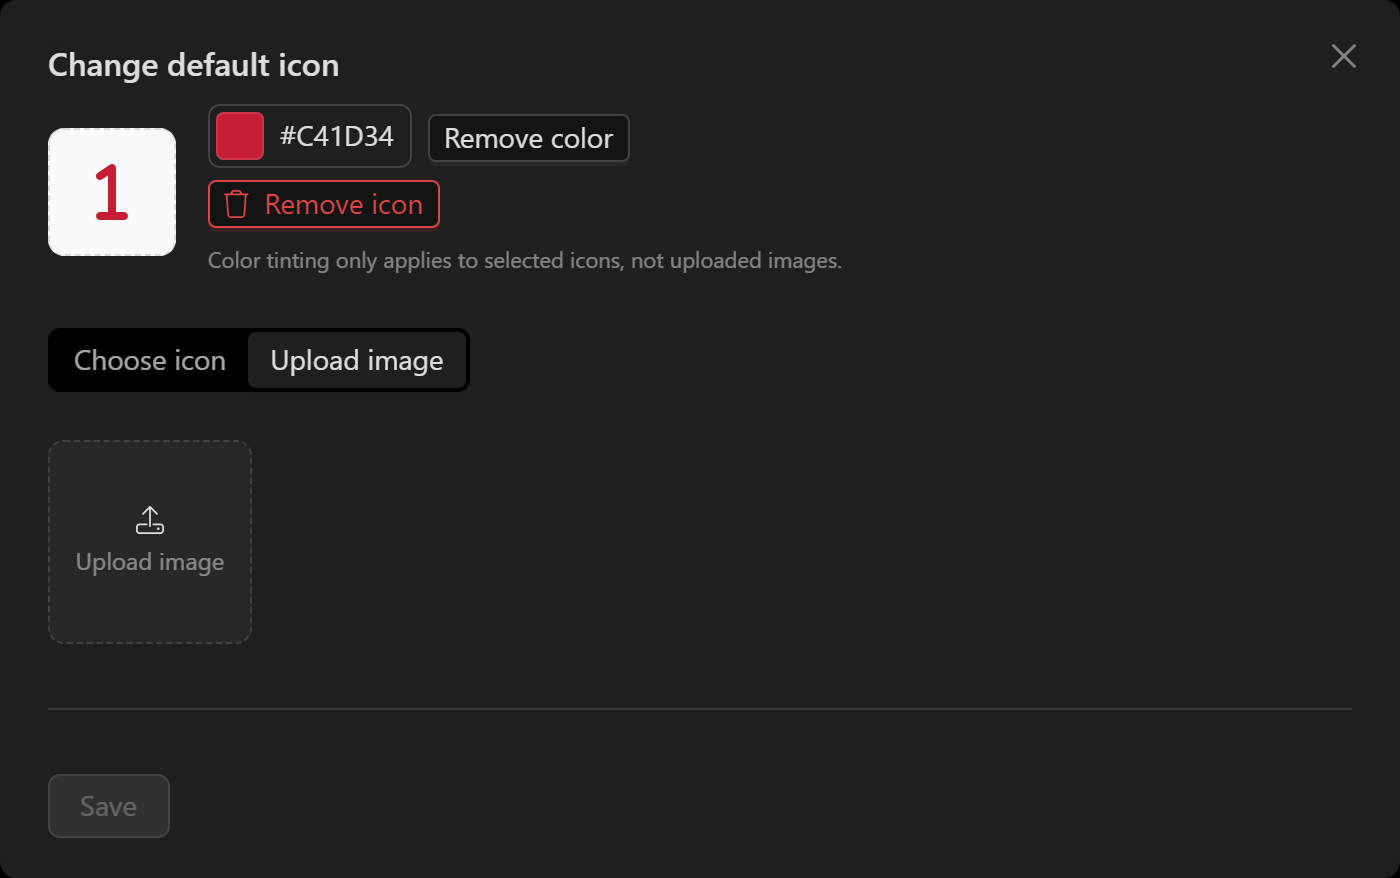
NOTE: Color tinting only applies to selected icons, not uploaded images.
Change the color
Opening the Color picker displays a panel where you can choose the tone with the palette and the hue slider, enter an exact HEX value and adjust the opacity.
Save the changes
Once the icon and color are the ones you want, press Save.
Refresh the tree to see the change
After saving, the tree may still show the previous icon. To bring in the change, press the refresh button (⟳) located next to the Search field of the devices tree.

After refreshing, the object will show the new icon and color in the tree and in any view where it is represented (for example, synoptics and maps).
TIP: To revert the customization, open the dialog again and use Remove icon and/or Remove color to restore the default appearance.