Create users, policies and assign permissions
This guide walks through, end to end, how to onboard a person in Netsocs Synergy and leave them with exactly the permissions they need: create the policy (the role), create the user, assign the policy and, if required, fine-tune their permissions over specific resources and objects.
For the conceptual model (what an ACL is, functional permissions vs. resource permissions) see Identity and Access Management (IAM). The focus here is the actual procedure in the platform.
The model in three pieces
| Piece | What it is | Where it is managed |
|---|---|---|
| Permission | An atomic system action, named module:action (for example dashboard:canUseDashboard). The catalog is fixed: the platform ships it, it is neither created nor edited. |
Permissions tab (read only) |
| Policy | A named set of permissions, that is, a role (system-operator, auditor…). |
Policies tab |
| User | The account that signs in. It receives policies, not loose permissions. | Users tab |
In addition, each user can have permissions over resources (event logs, dashboards, KPIs, synoptics, web pages…) and over objects (cameras, doors, sensors…). That is managed separately, in the User Permissions tab.
NOTE: the permission is written with a single colon (
dashboard:canAddWidgets). If you see themodule::actionnotation in older documentation, it is incorrect.
Step 1 — Open the administration module
In the sidebar, go to Users and Permissions.
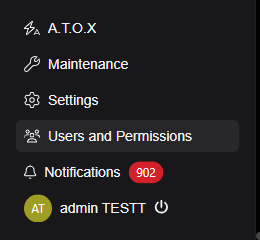
The Administration module opens with six tabs:

| Tab | What it is for |
|---|---|
| Users | Creating, editing and deleting accounts; assigning policies. |
| Tenants | Segmentation by tenant (multi-customer). |
| User groups | Grouping of users. |
| Policies | Create and edit roles (sets of permissions). |
| Permissions | System permission catalog (read only). |
| User Permissions | Fine-grained permissions per user: modules, resources and objects. |
Step 2 — Review the permission catalog
Before assembling a role, it helps to know what can be granted. The Permissions tab is the complete dictionary of the system: name and description, with a search box over both fields.
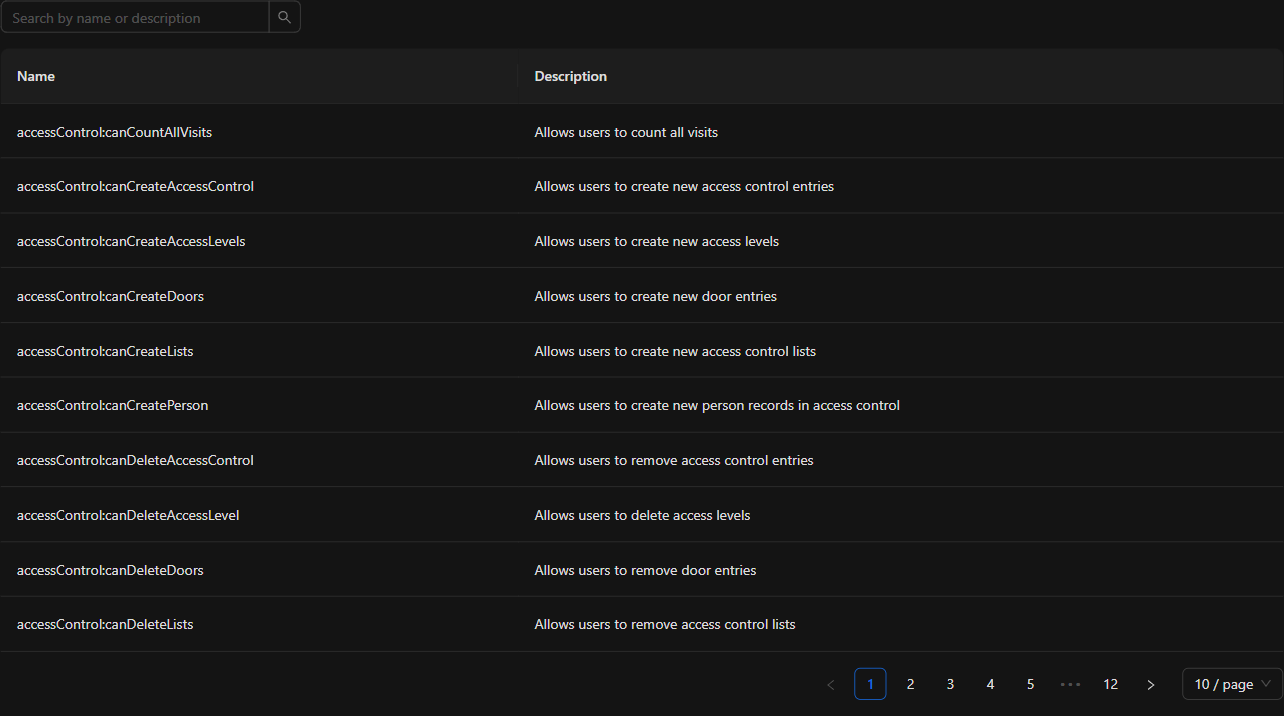
In the reviewed version there are 112 permissions, grouped by module through the prefix:
accessControl:, audits:, automation:, config:, copilot:, dashboard:, eventLog:,
groups:, liveVideo:, objects:, playback: and visits:.
This screen is read only: permissions are not created, not edited and not assigned directly to a user from here. The complete list with the explanation of each one is in Permission list.
Step 3 — Create the policy (the role)
In Policies you will see the existing policies with their description and the Permissions
count column (how many permissions each one contains). The platform ships several predefined ones
(system-administrator, system-operator, system-user, auditor, operator-intern).
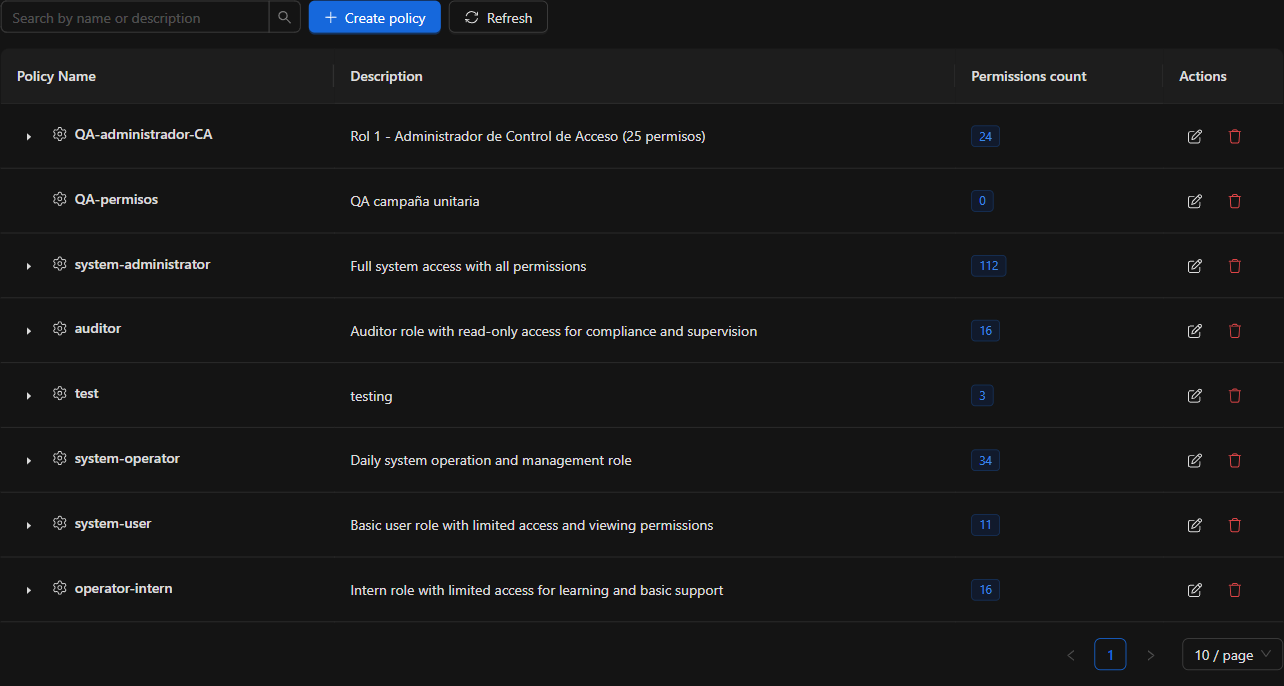
Click + Create policy. The form has three parts:
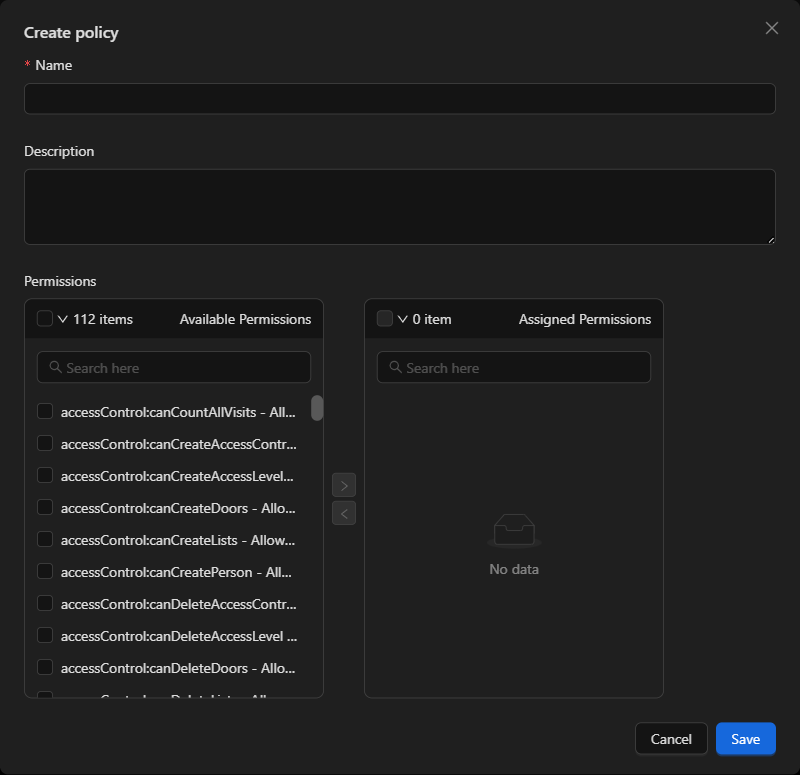
- Name — the policy identifier. Use a stable, descriptive name
(
monitoring-operator,access-supervisor). It cannot be changed later: when editing, the field is locked. - Description — what the role is for and who it is assigned to.
- Permissions — two lists: Available Permissions and Assigned Permissions. Check the
permissions on the left and move them to the right with the
>arrow.
Search the left panel by name or description; the search box filters over both. It is better to
search for a single word (canUseDashboard, playback) instead of long phrases.
The example builds a monitoring operator with four permissions: use the dashboard, see the live
video widget, use the event log widget and see Playback. Deliberately, dashboard:canSeeTree is
not granted: they will be able to use the dashboard, but not see the device tree.
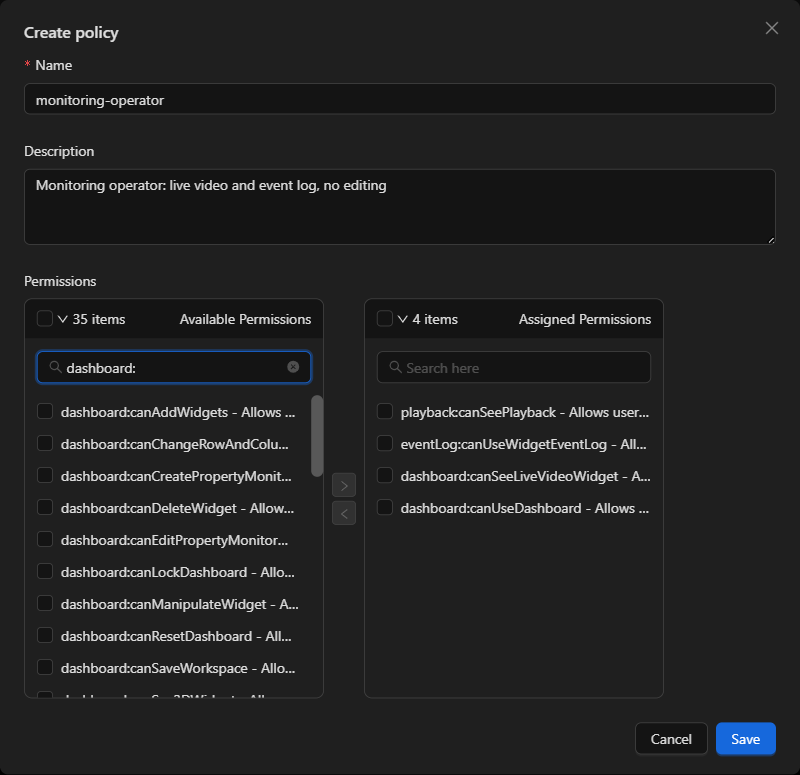
Click Save. The policy appears in the list with its permission count.
TIP: apply the principle of least privilege: start with an empty list and add only what is necessary. It is easier to add a permission later than to find out one was unnecessary.
Step 4 — Review and edit the permissions of a policy
Expand the arrow to the left of the name: the policy opens as a tree grouped by module, with the exact permissions it contains.
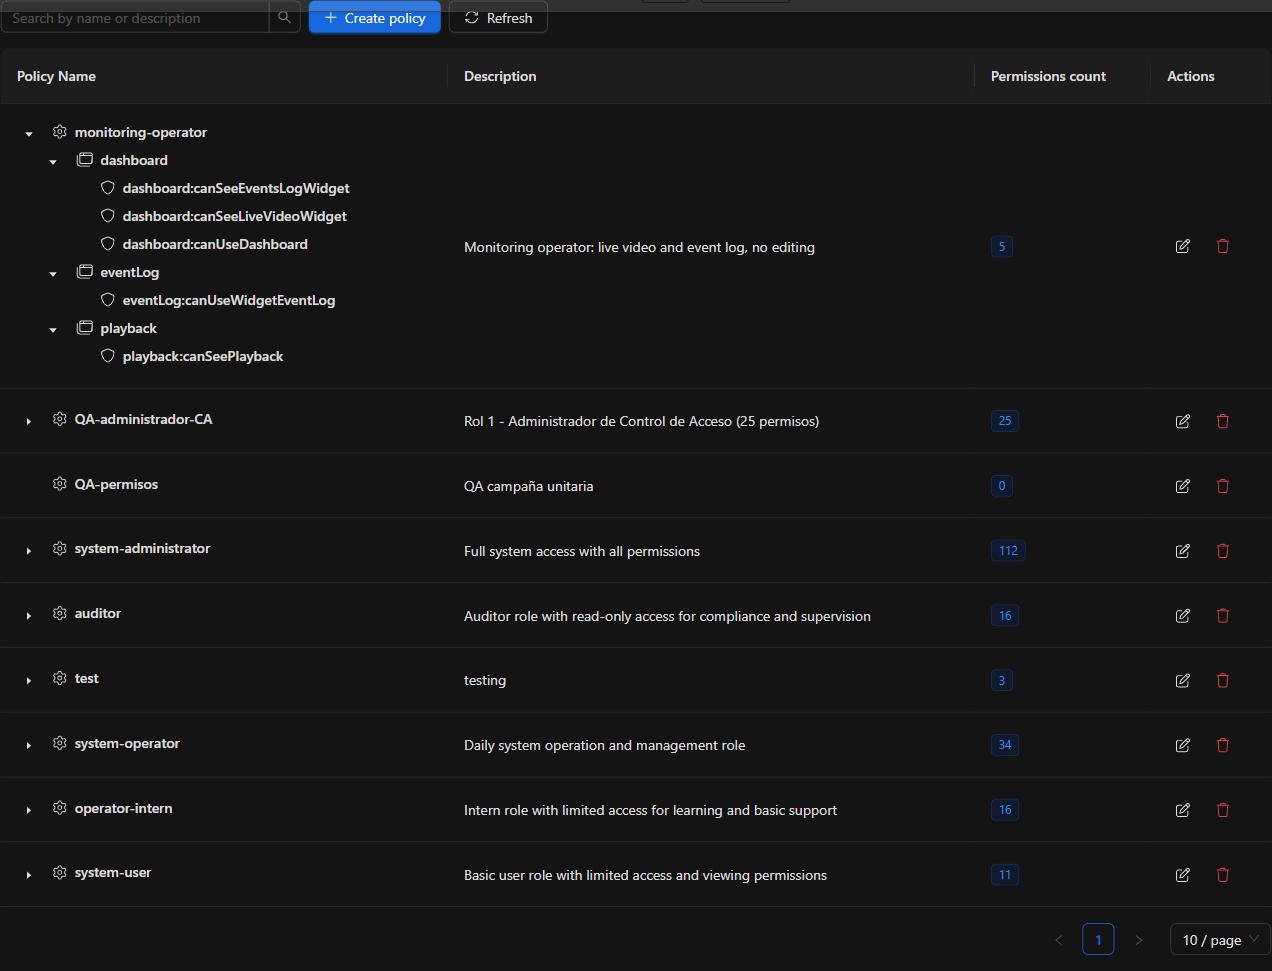
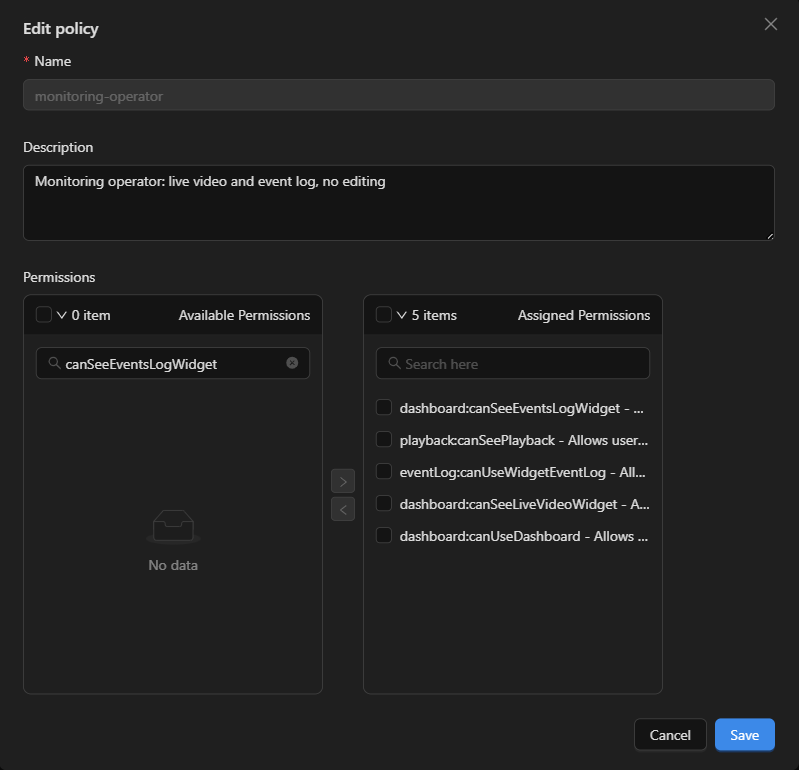
To add or remove permissions, use the edit icon on the row: the same form opens, with the name locked.
Step 5 — Create the user
In the Users tab, click + Create user.
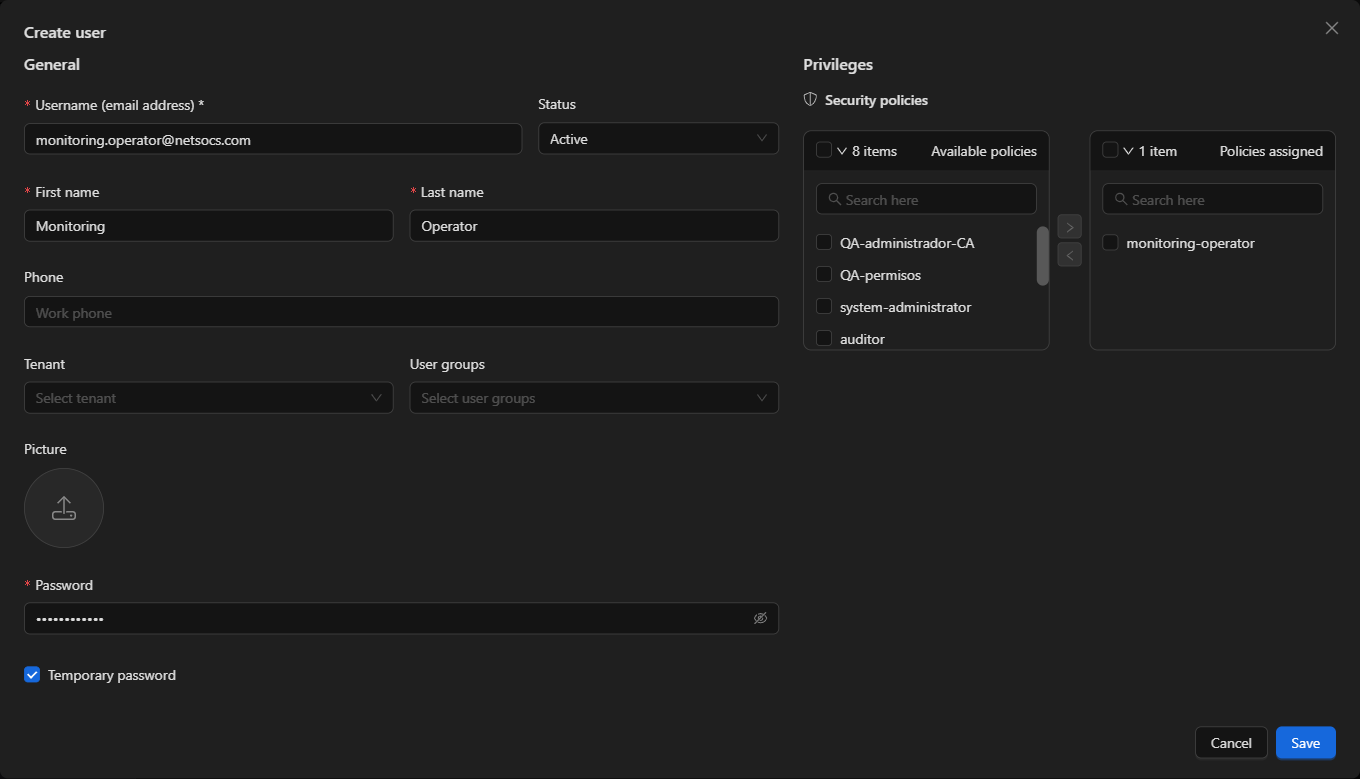
| Field | Notes |
|---|---|
| Username (email address) | This is the sign-in identifier. It must be an email address. |
| Status | Active by default. |
| First name / Last name | Required; they form the name displayed in the platform. |
| Phone, Picture | Optional. |
| Tenant, User groups | Optional; tenant segmentation and user grouping. |
| Password | Initial password. |
| Temporary password | If checked, the platform will ask to change it on the first sign-in. |
| Privileges → Security policies | The user's policies. They can also be assigned or changed later, by editing the account (step 6). |
Click Save. The user appears in the list.
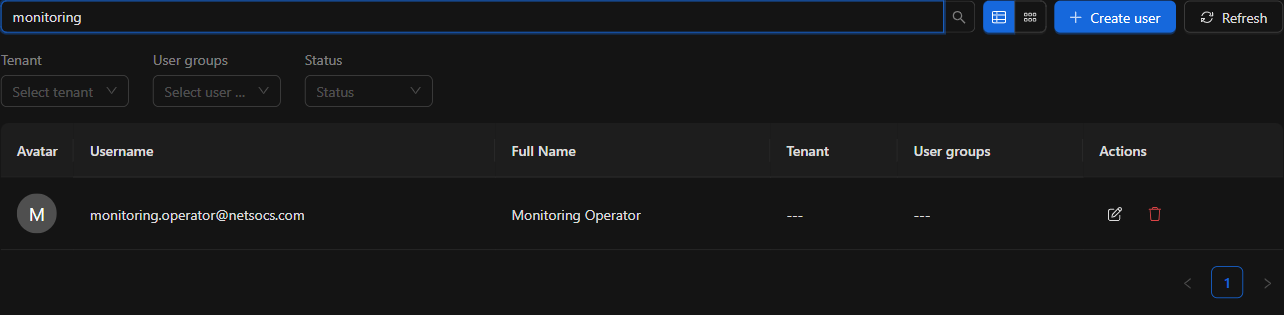
NOTE: the user table shows tenant and groups, but not the assigned policies. To see the roles of an account you have to open it with the edit icon.
Step 6 — Assign the policy to the user
- In Users, find the account and click the edit icon.
- In the Privileges → Security policies panel, check the policy in Available policies and
move it to Policies assigned with the
>arrow. - Click Save.
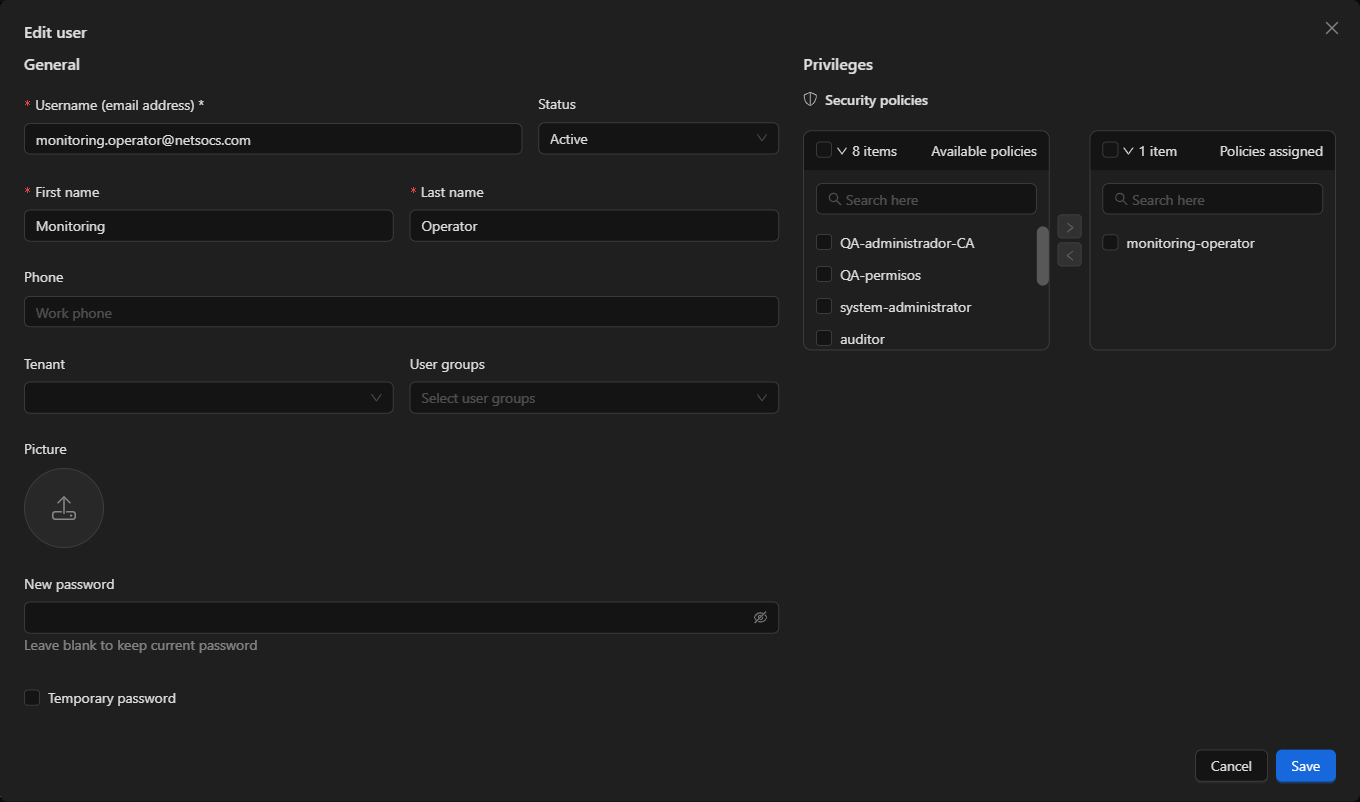
To confirm, open the user again: Policies assigned must show the policy. This is the reliable way to check which roles an account has.
From here on, the user can sign in and the interface adjusts to their permissions: whatever is not granted does not appear. To verify it, sign in with the new account (if you checked Temporary password, the platform will ask to change the password) and check that the sections and actions that were not granted are unavailable.
Step 7 — Fine-grained permissions per user (User Permissions)
Policies solve "what they can do". The User Permissions tab solves "what they can do it on": which event logs, which dashboards, which cameras.
Select the user in the tree on the left (the search box filters by first name, last name or email). The User Datasheet tab shows their record, including the User ID, useful for support and for API requests.
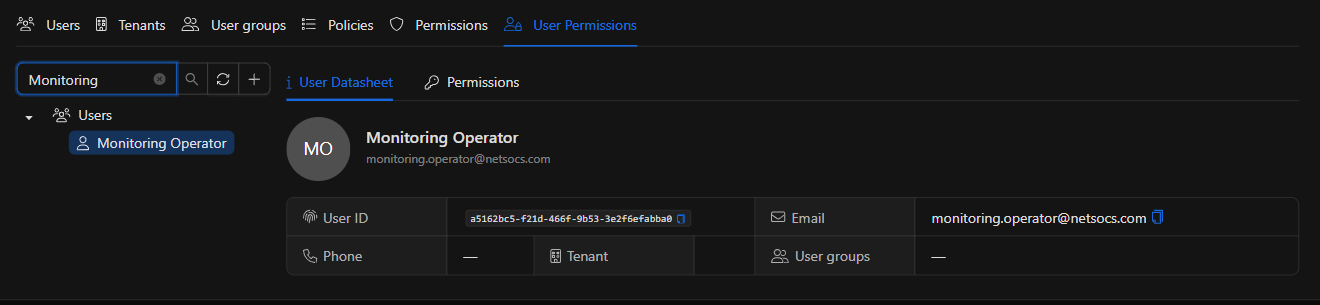
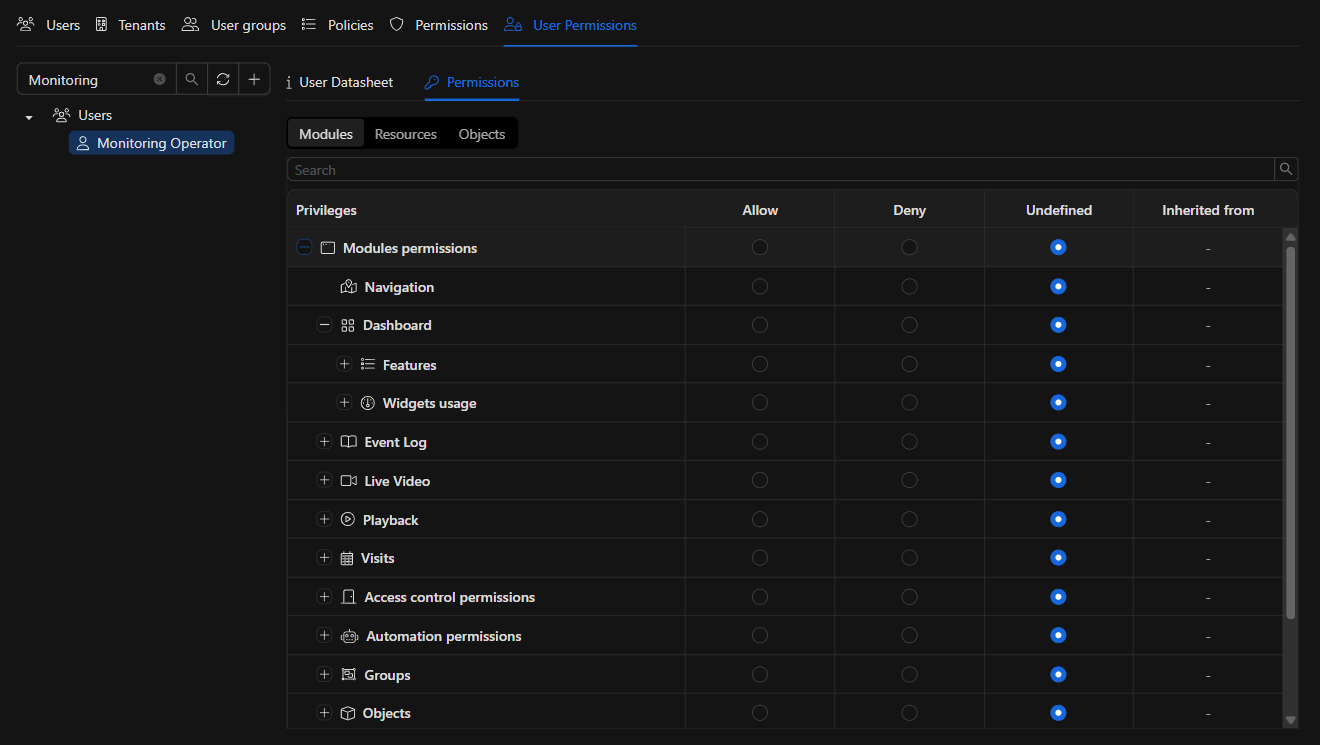
The Permissions tab offers three views: Modules, Resources and Objects.
Modules
It presents module permissions as a navigable tree (Dashboard → Features / Widgets usage, Event Log, Live Video, Playback, Visits, Access control, Automation, Groups, Objects, Audits, Copilot, Configuration) with the Allow, Deny, Undefined and Inherited from columns.
Resources
Here you define which specific resources the user can access. The tree groups by category: Events Log, Carousels, Synoptics, KPIs, Live Video Layouts, Web Pages and Dashboards, and inside each one the items created in the installation appear.
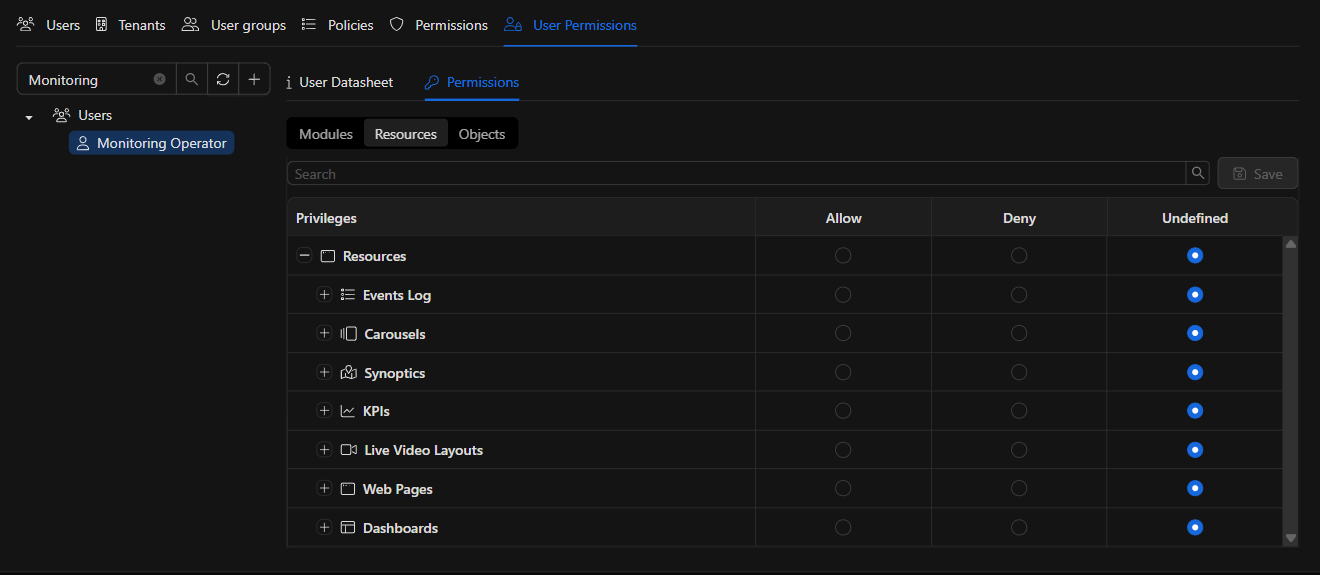
Each row is marked as Allow, Deny or Undefined; marking a category applies the value to all of its children. Changes are not sent until you click Save (top right), and while there are unsaved changes the "You have unsaved changes" notice is displayed.
Objects
Same mechanics, over the device → domain → object tree, with its own columns:
| Column | Meaning (according to the help on the screen itself) |
|---|---|
| Deny All | The object is invisible to the user. |
| Read Only | Sees properties, events, state changes and action executions, but cannot modify them. |
| Read and Write | Can also modify them; cannot execute actions. |
| Actions | Actions the user can execute on the object. |
| Full Access | Full access. |
Changes are confirmed with Save, just like in Resources.
The admin account is protected
The initial administration account (admin@netsocs.com, or any user whose email starts with
admin@) is the guaranteed way into the installation, so the platform shields it:
- It cannot be edited or deleted from the user list (the buttons appear disabled).
- Its permissions cannot be changed from User Permissions, not even from the admin account itself.
This is intentional: it prevents an accidental click from leaving the installation without access.
Flow summary
- Permissions → look at which permissions exist.
- Policies →
+ Create policy, name + description + permissions → Save. - Users →
+ Create userwith their details → Save. - Users → edit the user → Security policies → assign the policy → Save.
- Users → reopen the user and confirm in Policies assigned.
- (Optional) User Permissions → narrow down specific resources and objects.