Video Download — User Guide
This guide shows you how to download a recorded video segment from a camera and how to track the progress of your download jobs.
Table of Contents
- Open a Live Video Widget
- Switch to Playback Mode
- Select the Time Range to Download
- Open the Download Dialog
- Configure and Start the Download
- Track Download Progress
- Download the Completed File
- Managing Your Download Jobs
1. Open a Live Video Widget
You need a Live Video widget loaded with a camera before you can download anything.
If you already have a camera open in a widget, skip to Step 2.
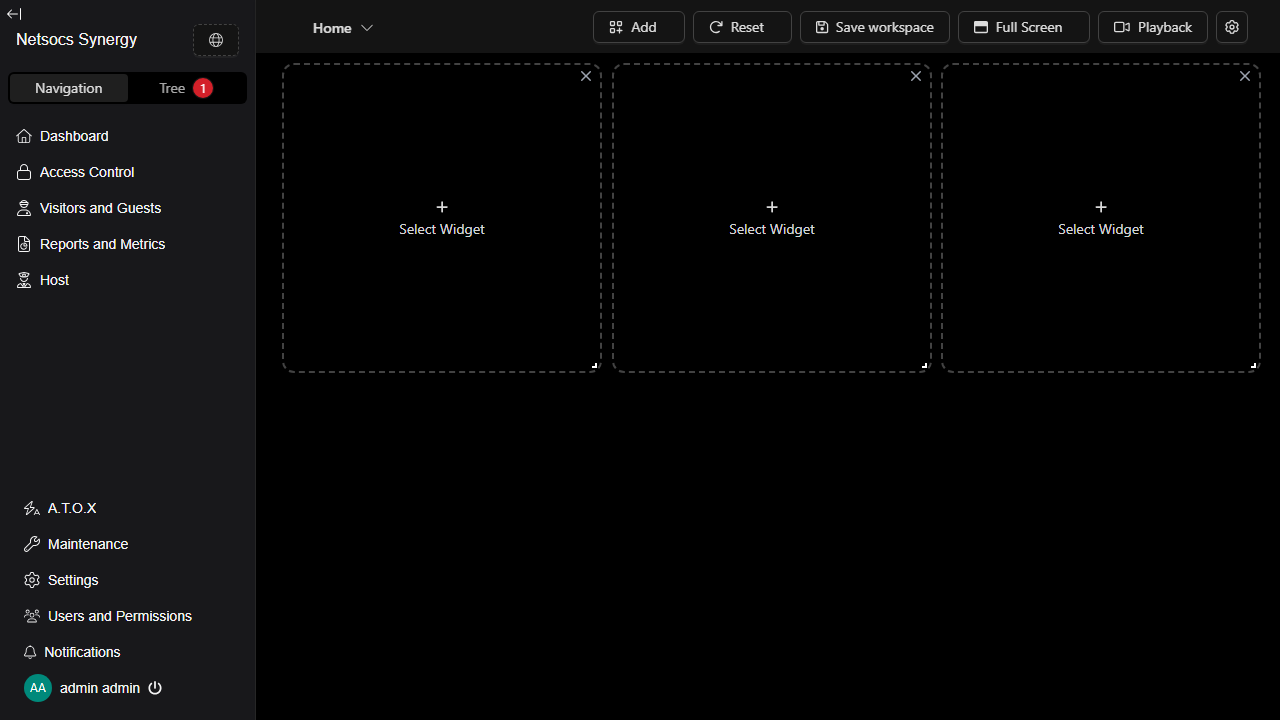
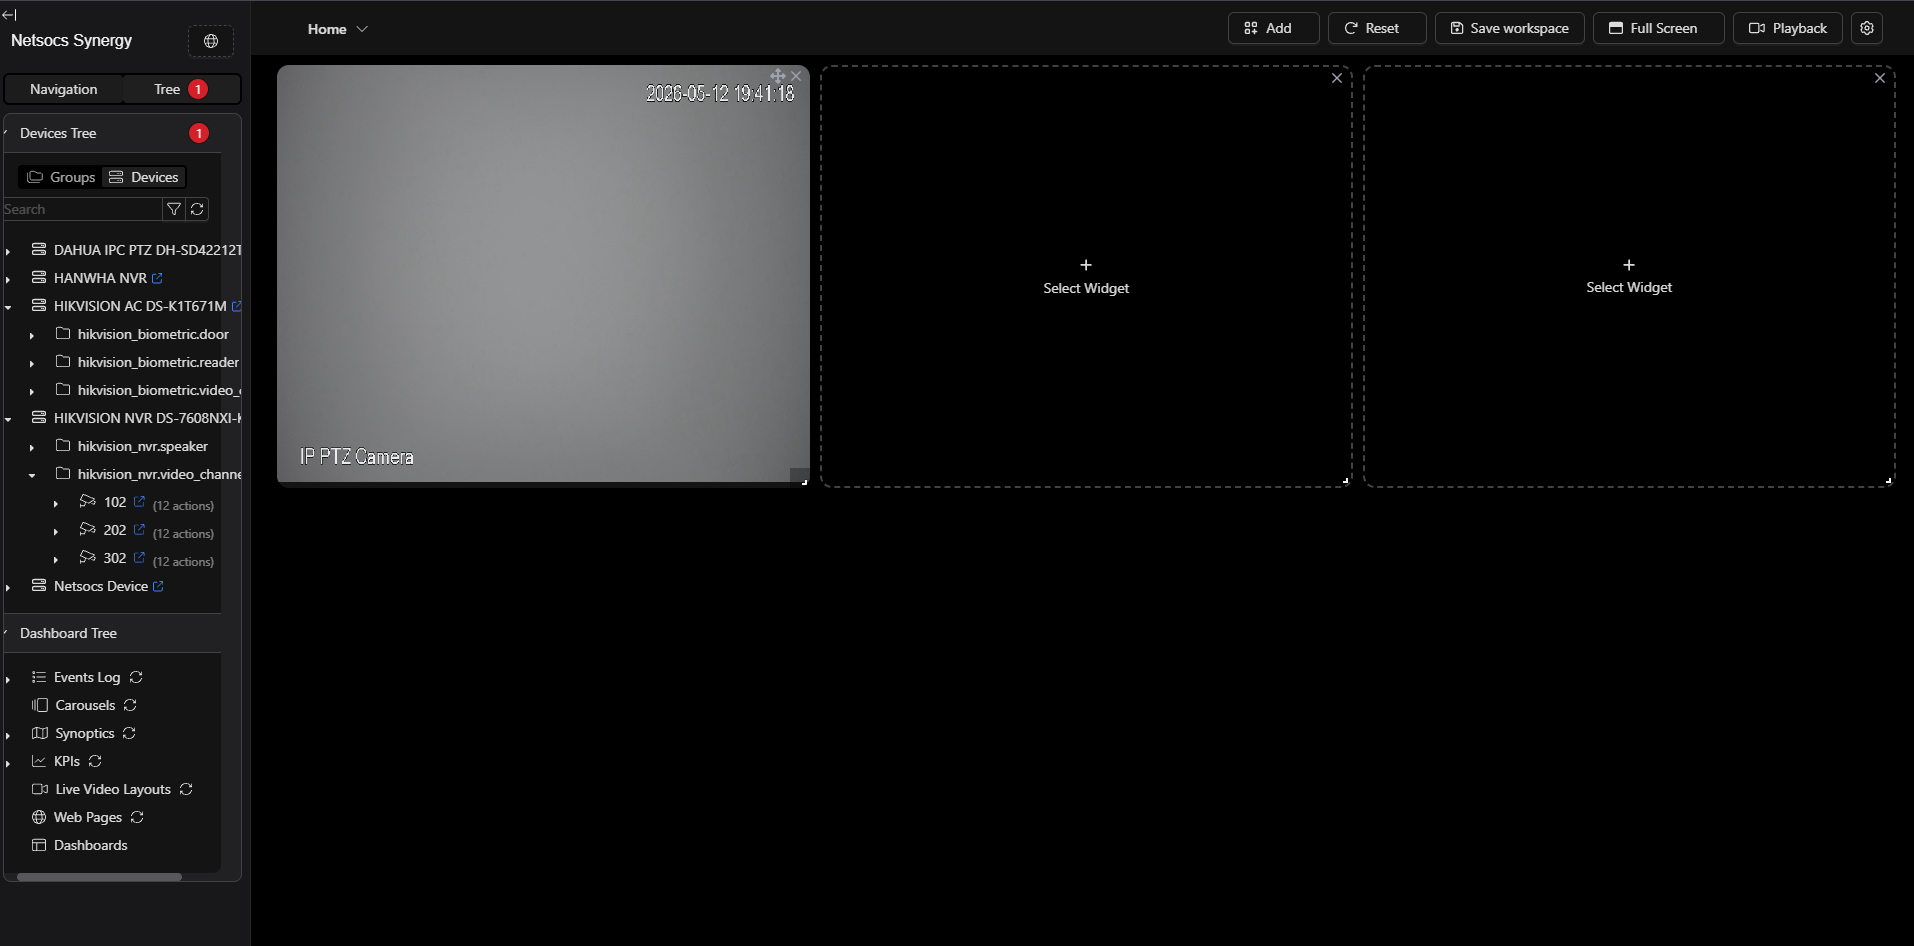
Start from the main dashboard. You will see one or more empty widget slots.
Click the Tree tab in the top-left panel to open the device browser.
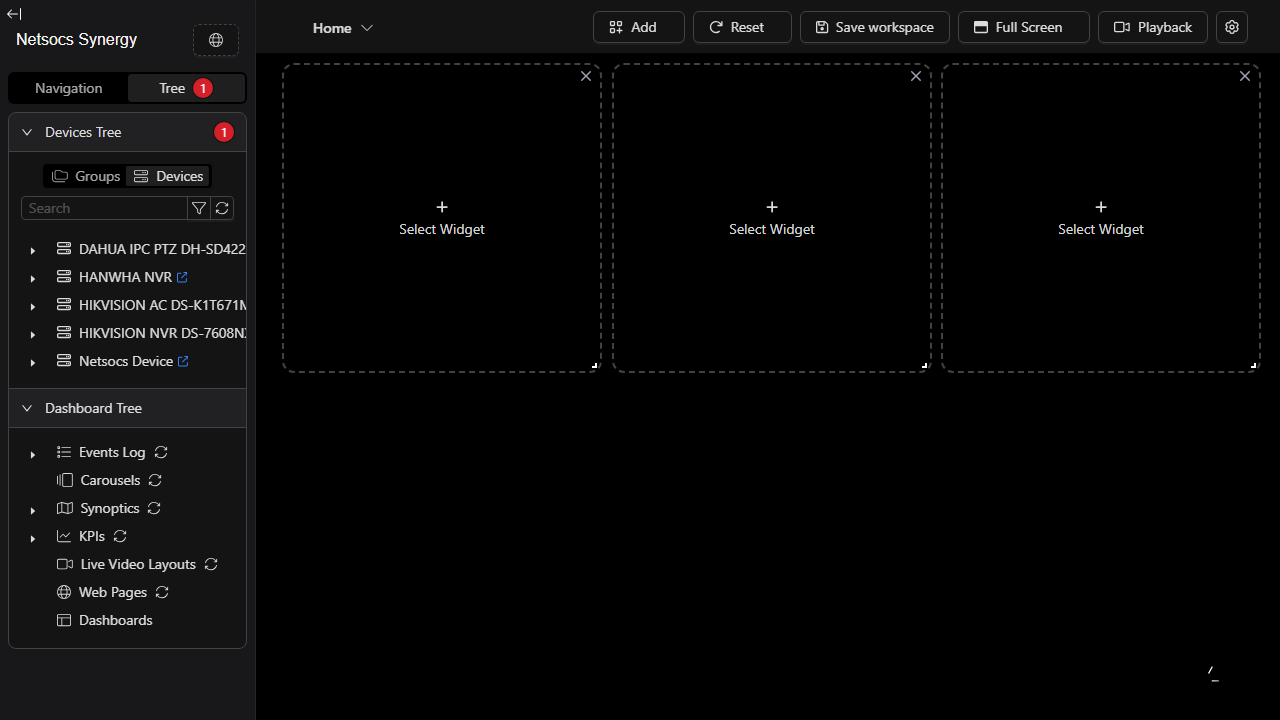
Click the Devices button inside the panel to list all connected devices.
Find your NVR or camera recorder in the list and click the arrow next to it to expand it.
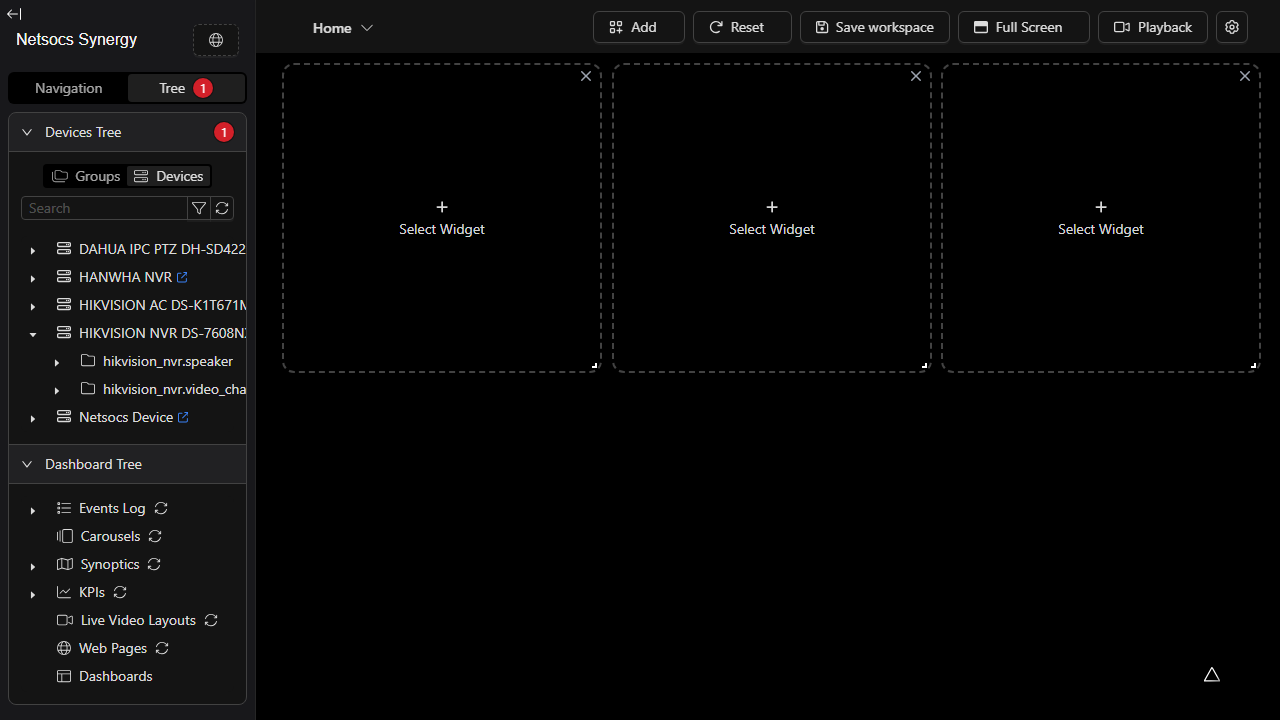
Click the arrow next to the video_channel group to reveal the individual cameras.
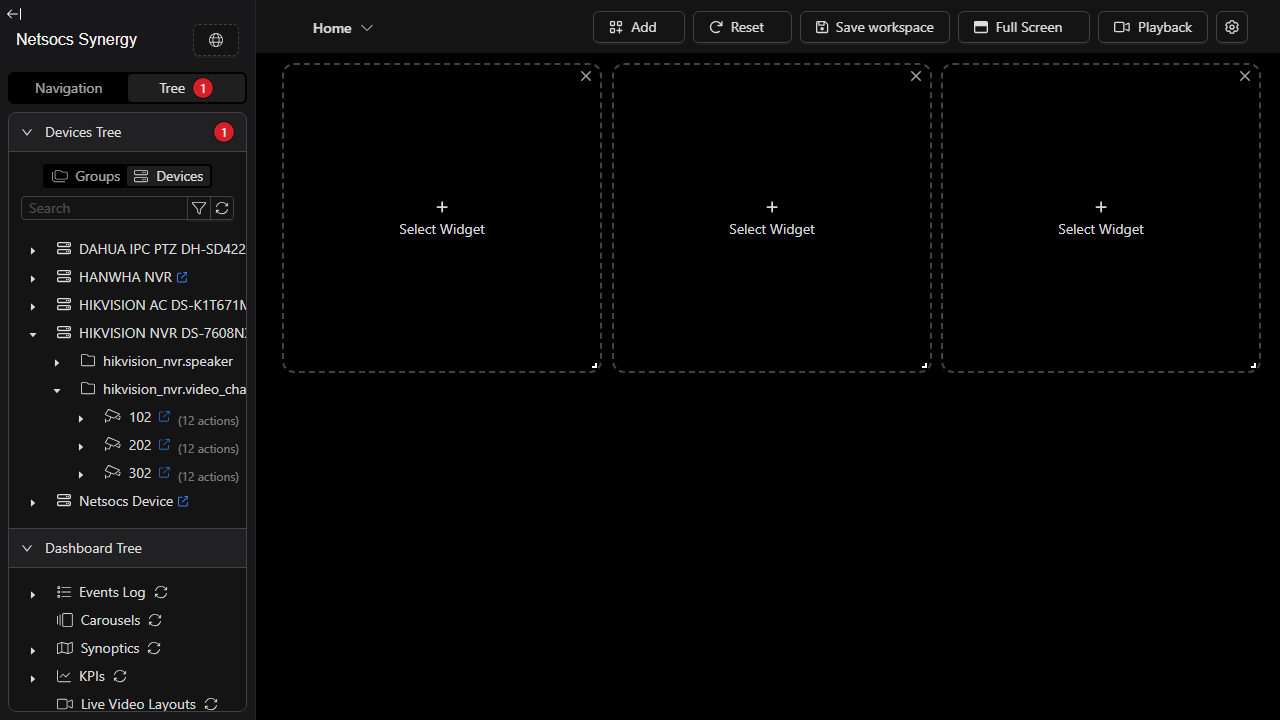
Drag a camera from the list onto an empty Select Widget slot on the dashboard. The widget will load the camera's live stream.
If you see a "Connection Error" message inside the widget, the live stream is temporarily unavailable. You can still use Playback mode to browse and download recorded footage.
2. Switch to Playback Mode
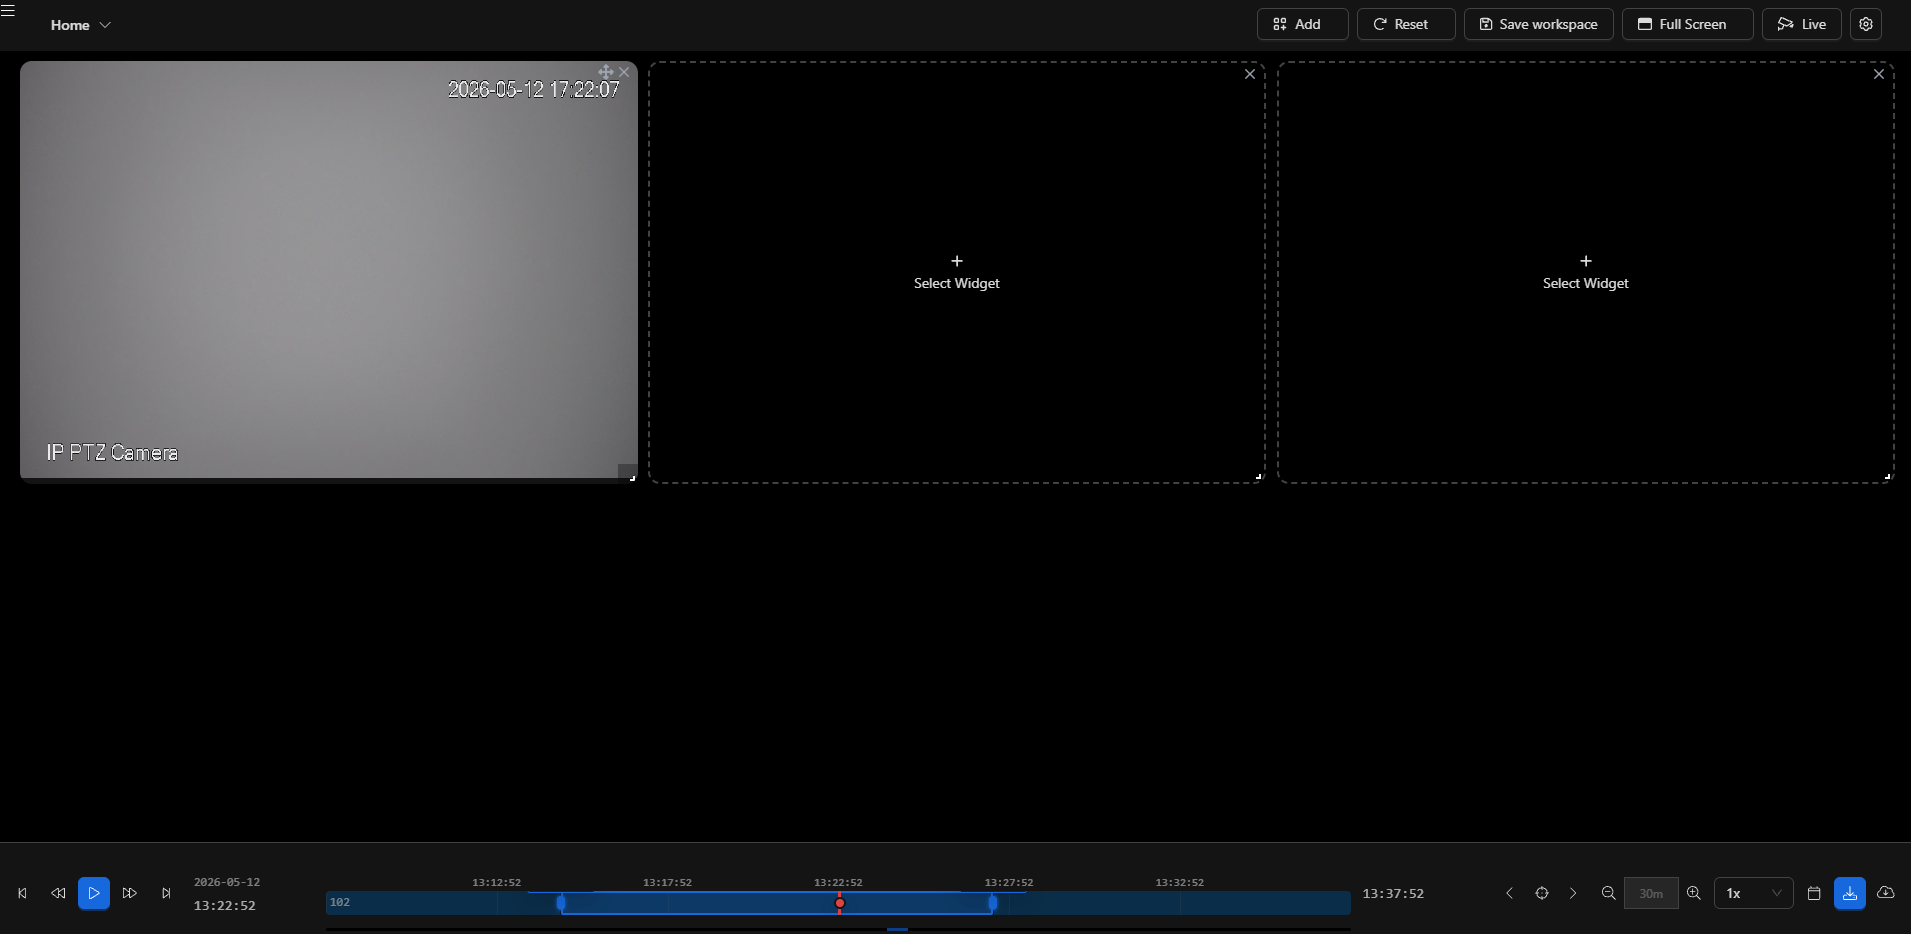
With the camera widget on screen, click the Playback button in the top toolbar.

The view switches to Playback mode and a timeline bar appears at the bottom of the screen. The colored segments on the timeline represent periods when recorded video is available.
Timeline controls at a glance:
| Control | What it does |
|---|---|
| Play / Pause button | Plays back recorded video at the selected time |
| Date & time display | Shows the current playback position |
| 1d button | Sets the timeline to show one full day |
| Arrow buttons ( < > ) | Moves the timeline back or forward |
| Zoom buttons ( + − ) | Zooms the timeline in or out |
| Speed selector (1x) | Changes playback speed |
3. Select the Time Range to Download
To mark a time range for download, use a right-click drag directly on the timeline bar:
- Move your mouse cursor to the start time you want on the timeline bar.
- Press and hold the right mouse button.
- While holding, drag to the right to the end time you want.
- Release the right mouse button.
A blue shaded area will appear on the timeline, showing the selected range.
Tip: You can select any range, even outside the available recordings. The system will only download footage that actually exists.
4. Open the Download Dialog
After selecting a range, a download icon ( the cloud-with-arrow icon ) appears in the controls bar at the bottom of the screen — just to the left of the last button.
Click that download icon to open the Download dialog.
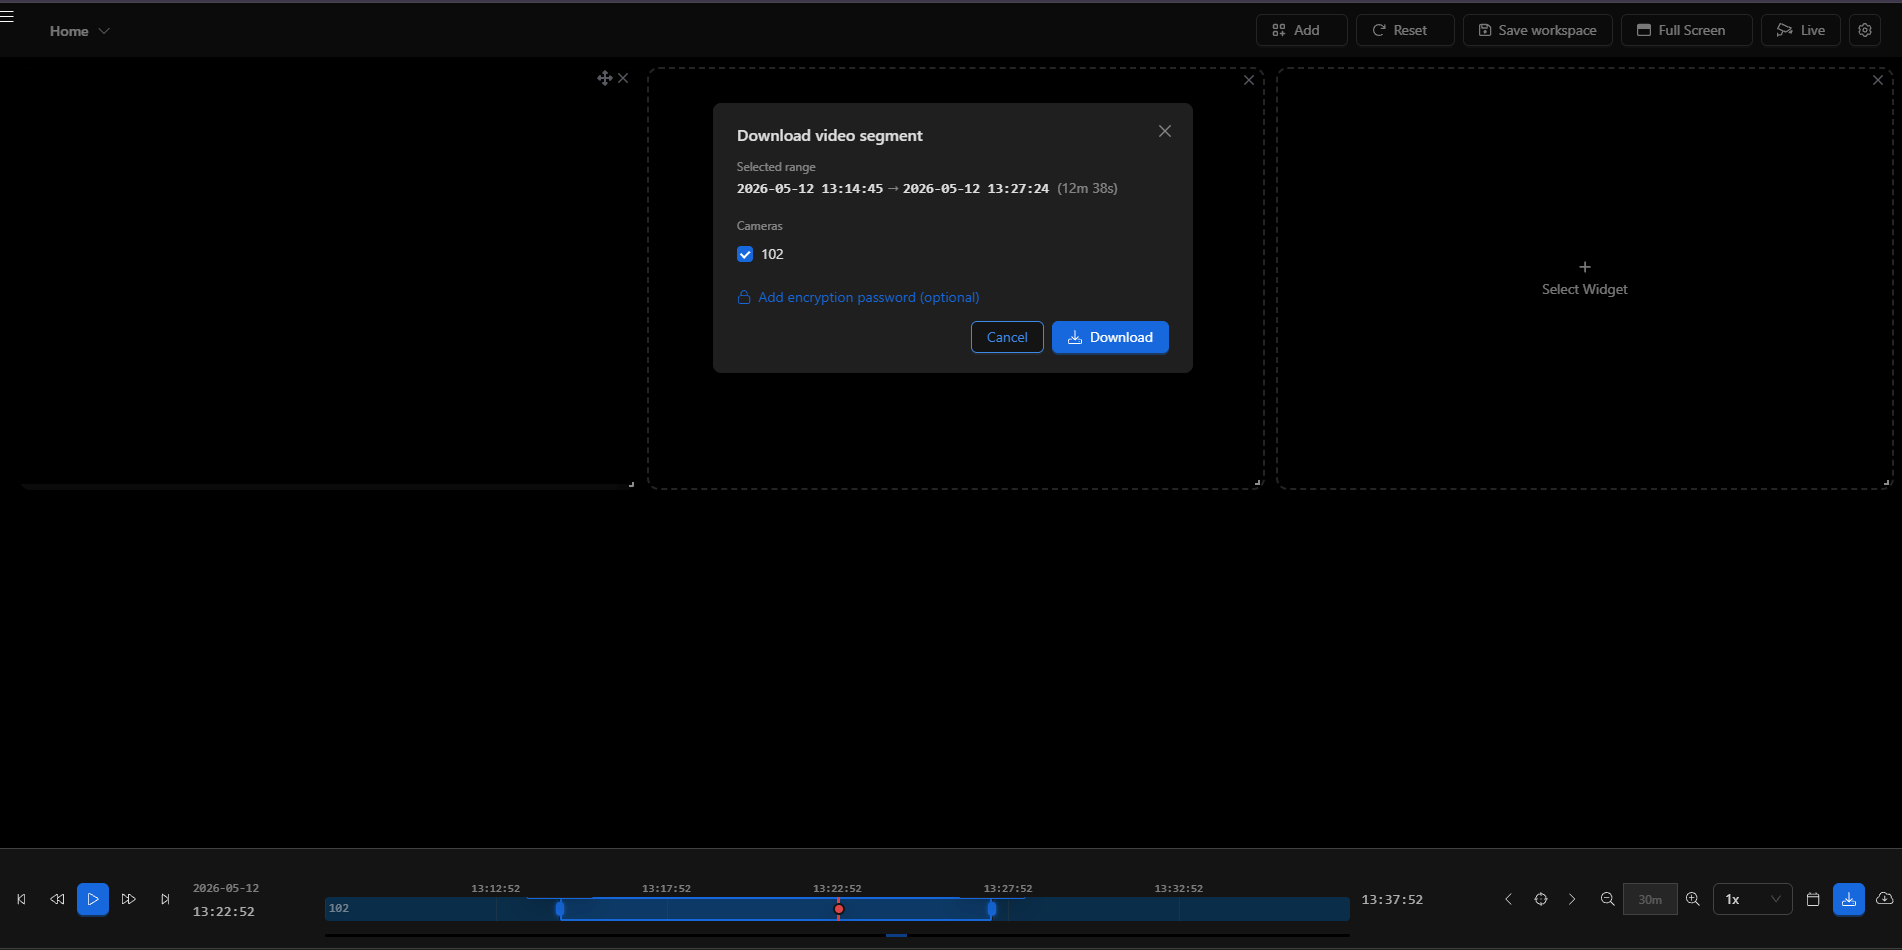
The dialog shows:
- Selected range — the exact start and end times you marked, plus the total duration.
- Cameras — a checkbox for every camera that has recordings in that range. All eligible cameras are checked by default.
5. Configure and Start the Download
Choose which cameras to include
Each camera with available footage appears as a checkbox. Uncheck any camera you do not want to include in the download.
Add an encryption password (optional)
If you want the downloaded video file to be encrypted with a password, click Add encryption password (optional).
A password field appears. Type your password and it will be applied to the file.
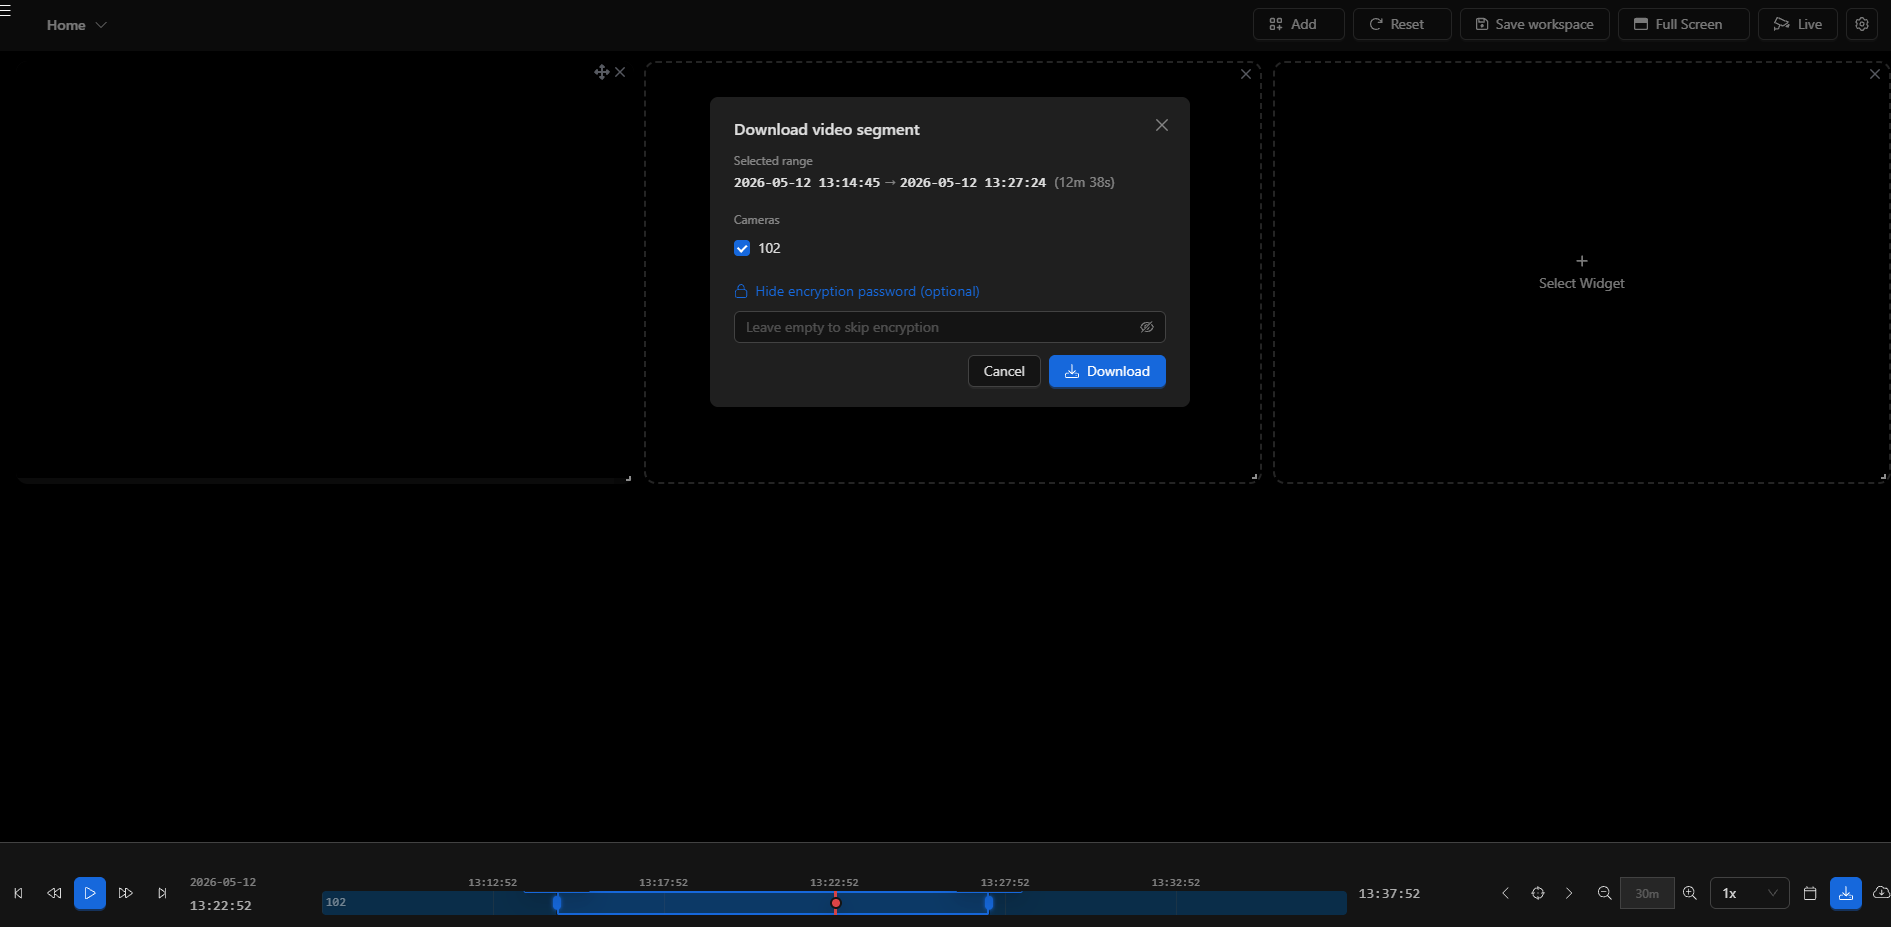
Click Hide encryption password to collapse the field (the password you typed is still saved).
Encrypted files require the same password to play back. If you lose the password, the file cannot be recovered.
Start the download
When you are ready, click the blue Download button.
- The dialog closes automatically.
- A green success notification appears in the top-right corner confirming that the download job has started.
- The system begins processing the video on the server in the background.
You can continue using the dashboard normally while the download is being prepared — you do not need to stay on this page.
6. Track Download Progress
All your download jobs are listed on the Video Downloads page. You can reach it in two ways:
- Click the "View download jobs" link inside the success notification after starting a download.
- Or navigate directly to
/video-downloadsfrom your browser.
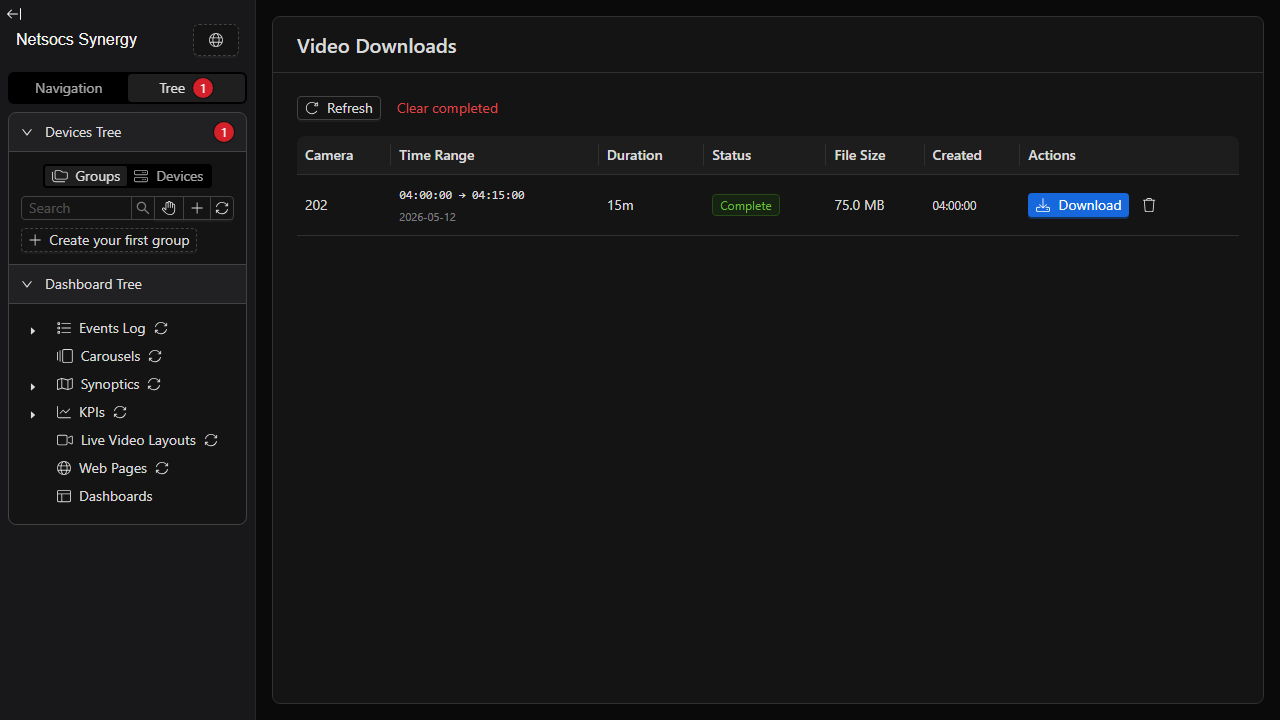
Understanding the table columns
| Column | What it shows |
|---|---|
| Camera | The name of the camera channel |
| Time Range | The start and end time of the recorded segment |
| Duration | Total length of the requested segment |
| Status | Current state of the job (see below) |
| File Size | Size of the finished file (shown when complete) |
| Created | When the download job was created |
| Actions | Buttons to download, cancel, or remove the job |
Job status meanings
| Status | Color | Meaning |
|---|---|---|
| Pending | Yellow | The request is queued, waiting to start |
| Downloading | Blue | The NVR/camera is sending the footage |
| Receiving | Blue | The server is receiving the video data |
| Processing | Purple | The video is being packaged into a file |
| Complete | Green | The file is ready to download |
| Failed | Red | Something went wrong — hover over the status for details |
| Cancelled | Gray | The job was cancelled by the user |
The page automatically refreshes active jobs every few seconds so you always see the latest status.
7. Download the Completed File
When a job reaches Complete status, a blue Download button appears in the Actions column.
Click Download to save the video file to your computer.
The file will be saved to your browser's default download folder in MP4 format.
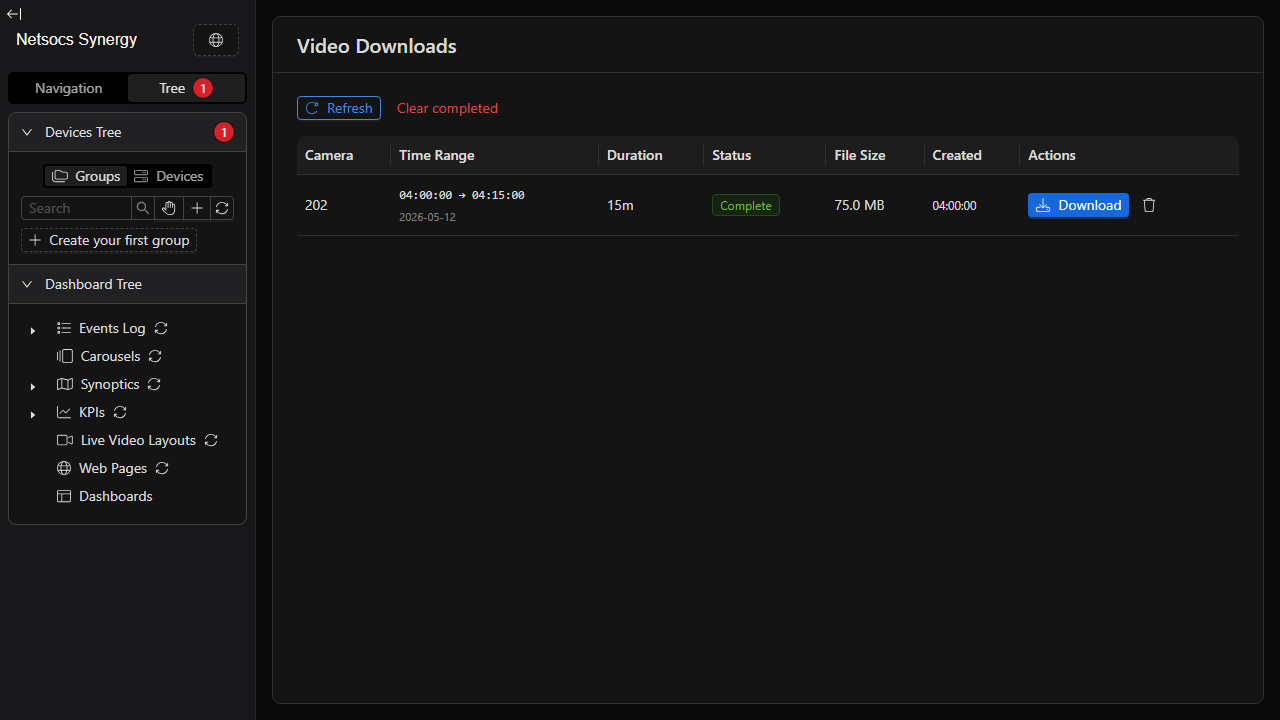
8. Managing Your Download Jobs
Refreshing the list manually
Click the Refresh button at the top of the page to immediately fetch the latest status of all jobs, without waiting for the automatic update.
Cancelling an active job
If a job is still in progress and you no longer need it, click the Cancel button in the Actions column. The job will be marked as Cancelled and no file will be created.
Removing finished jobs from the list
Click Clear completed to remove all jobs that have finished (Complete, Failed, or Cancelled). This only clears the list display — it does not delete any files that were already downloaded.
Removing a single job
Click the trash icon next to any terminal-state job (Complete, Failed, or Cancelled) to remove that single row from the list.
Frequently Asked Questions
Can I start multiple downloads at the same time? Yes. Each camera you select in the Download dialog creates a separate job. You can also open the dialog multiple times for different time ranges.
How long does a download take? It depends on the length of the recording and the speed of the NVR. A 15-minute clip typically completes in under a minute.
What happens if the download fails? The job will show a red Failed status. Hover over the status badge to see the error message. Common causes are: the NVR was offline during the request, or the recording was not available for that time range.
Can I leave the page while a download is processing? Yes. The download happens entirely on the server. You can close the page and come back later — the job will continue and the file will be waiting for you when it is done.
Is the downloaded file playable on any video player? Yes, as long as you did not set a password. Encrypted files require a compatible player that supports the encryption format used by NetSocs.