Reviewing recorded video
Watching live is how you react; reviewing the recording is how you understand what happened and, when needed, leave evidence behind. This chapter covers the dashboard's playback mode: how to switch from live to recorded, how to move along the timeline and how to take a fragment of video with you.
Switching from live to recorded
The Playback button is in the dashboard's top bar. When you click it, the video panels stop showing the live feed and a timeline appears at the bottom of the screen. The button changes to Live, which is the way back.
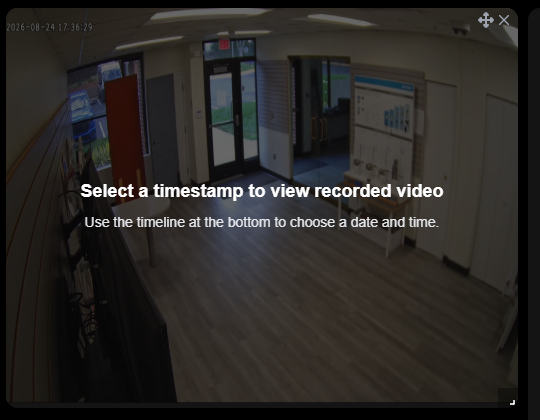
On entering, the panel does not play anything yet: it asks you to pick a moment. That is correct — the platform cannot guess which time you care about — and one click on the timeline settles it.
NOTE: Playback mode affects every video panel on the dashboard at once, not just one. That is exactly what you need when reviewing an incident: all cameras move through the same time in sync.
The timeline
This is the central control of the mode:

From left to right:
| Area | What it does |
|---|---|
| Transport controls | Go to start, step back, play/pause, step forward, go to end |
| Date and time | The exact moment being played |
| Time bar | The highlighted stretches are the hours that have recording; the dark ones do not |
| Navigation ‹ ⊕ › | Shifts the visible range and returns to the current moment |
| Scale (1d) with magnifiers | Widens or narrows the time window shown |
| Speed (1x) | Fast or slow playback |
| Calendar | Jumps to another day |
| Cloud | Opens the video downloads page |
To pick a moment, click on the bar: the marker moves to that time and the panel loads the matching recording.
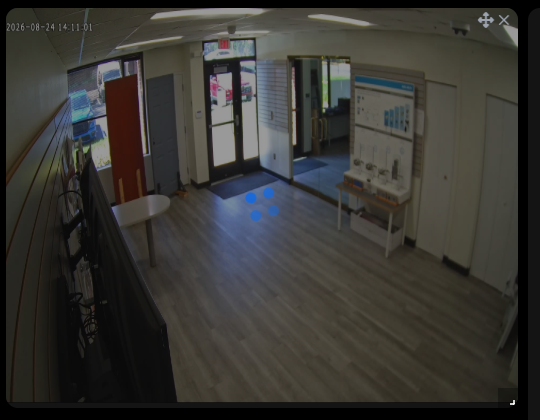
TIP: Before searching blindly, look at where the highlighted stretches are. If the time you are after falls in a dark area, there is no recording for that moment and it is not a playback problem: the NVR or video engine did not store that stretch.
From the event to the video
The fastest route is not looking for the time by hand, but starting from the event. In the event log, the event row carries its exact date and time and the object that generated it. With that:
- Enter Playback mode.
- Adjust the scale to close in on the period (at
1dyou see the whole day; you want to go down to hours or minutes). - Click a few seconds before the event time: what matters is usually what happened just before.
Taking the evidence with you
When a fragment has value — an incident, a claim, a report — it is exported as a file:
- On the timeline, right-click and drag to mark the range you want. It stays shaded.
- A download button appears in the bottom bar, next to the cloud icon. Click it.
- The download dialog opens:
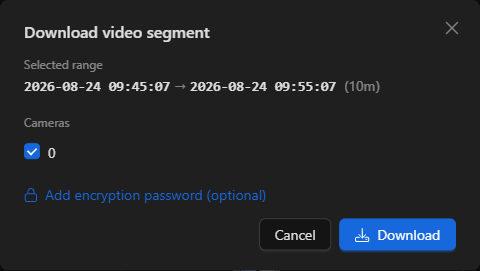
It shows the selected range with its duration, the list of cameras with recording in that range — each one produces its own file — and the option to add an encryption password, advisable whenever the video leaves the organization.
On confirming, the download is processed as a background job: there is no need to wait with the window open. The cloud icon on the timeline takes you to the Video Downloads page, where you track the status of each job and download the file once it is ready.
NOTE: The complete export procedure — job states, timings, what to do when one fails — is detailed in the Video download guide.
When you cannot see the recording
| Symptom | Usual cause |
|---|---|
| The panel still says Select a timestamp | You have not clicked on the timeline yet |
| The timeline is almost entirely dark | There is no recording in that range: check the retention of the NVR or the video engine |
| I picked a time and the panel stays black | That particular stretch has no recording even though the day does |
| One panel plays and another does not | That camera is not recording, or its recording does not cover that period |
| The download job fails | The device was disconnected, or the requested range does not exist on the recorder |
Previous: Viewing live cameras · Next: Handling an event end to end