Viewing live cameras
Live video is half of the monitoring station. This chapter covers the two ways to put a camera on screen, what each control on the panel does, and how to move a PTZ camera.
Two ways to put a camera on screen
They answer different needs and are worth keeping apart:
| Way | What it is for |
|---|---|
| Dragging the camera from the tree | A quick look: "I want to see what is happening at that door right now". It takes seconds to set up and is just as quick to discard |
| A saved video layout | The fixed view of the shift: 4, 6 or 9 cameras always in the same position, loaded automatically when the dashboard opens |
Quick look: drag from the tree
- In the sidebar, open the Tree tab and find the device.
- Expand until you reach the camera's video channel.
- Drag the channel and drop it on an empty slot of the dashboard (Select Widget).
The slot turns into a video panel streaming that camera. When you no longer need it, close the widget with the ✕ and the slot is free again.
IMPORTANT: This only works when you drag the video channel, not the device or the domain folder. If you drop anything else nothing happens and no error message appears; it looks as if the interface froze, but it simply ignored what you dropped. If nothing happens when you drop, check that you are dragging the channel.
Fixed view: saved layout
When you choose the Live Video widget, the Custom tab lets you create a named layout and pick its arrangement:
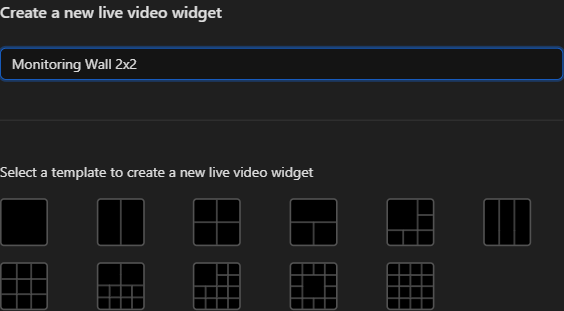
You pick the template (1x1, 2x2, 1+5, 3x3…), assign a camera to each cell and save it. From then on that layout appears in the Layout default list and can be reused on any dashboard.
NOTE: A saved layout stores which objects each cell points to. If those objects are recreated — by registering the device again, for example — the identifiers change and the layout ends up pointing at channels that no longer exist: the panels show an error and never load. When that happens, the fix is to rebuild the layout with the current channels, not to restart the video.
The panel controls
Hovering over a panel reveals its controls: the panel's own along the top, the image's on the right.
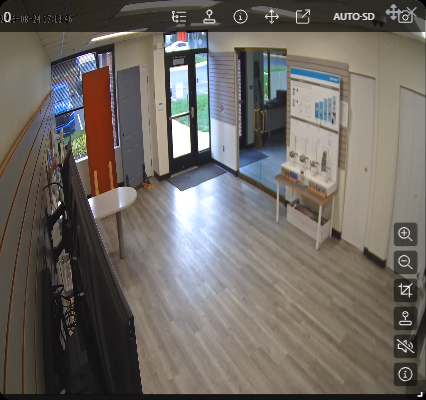
Top bar
| Control | What it does |
|---|---|
| Tree | Changes the panel's camera without leaving the dashboard |
| Joystick | Opens the camera's PTZ control |
| Info | Data about the video object |
| Move | Repositions the panel within the grid |
| Open in window | Opens the camera in a separate window, useful for a second monitor |
| AUTO·SD / HD / SD | Stream quality |
| Camera | Takes a snapshot of the current image |
| ✕ | Closes the panel |
Side controls
| Control | What it does |
|---|---|
| Zoom In / Zoom Out | Digitally zooms the image in or out |
| Select Area to Zoom | Enlarges an area you draw with the cursor |
| PTZ control | Enables movement control on the image itself |
| Unmute audio | Turns on the camera's audio, if it has any |
| Show stream stats | Displays the stream statistics |
TIP: The quality button cycles through three states: AUTO·SD (the platform decides and is currently delivering SD), HD (forced high) and SD (forced low). On a wall with many cameras, leave them on automatic or SD and raise only the one you are investigating to HD: every HD panel consumes bandwidth and video server capacity.
Knowing whether the video is arriving properly
The Show stream stats button overlays the real state of the transmission:
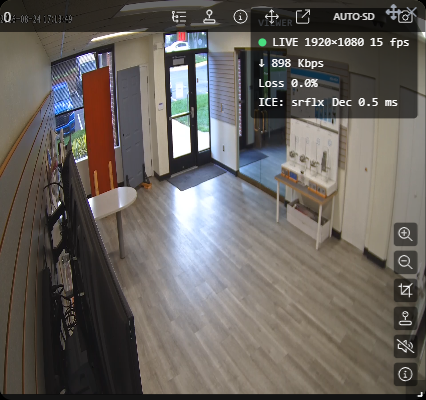
It shows whether it is LIVE, the resolution, frames per second, download bandwidth, packet loss percentage and decoding latency.
It is the first tool to reach for when someone reports that "the camera looks bad": if packet loss is high or the fps drop, the problem is in the network or the camera, not in the platform.
Moving a PTZ camera
If the camera is motorized there are two ways to take control, and both are worth knowing because they suit different moments.
On the image itself
The joystick among the side controls enables control directly over the video: a circle appears at the center of the image and, as the on-screen message says, you drag from the center to move the camera.
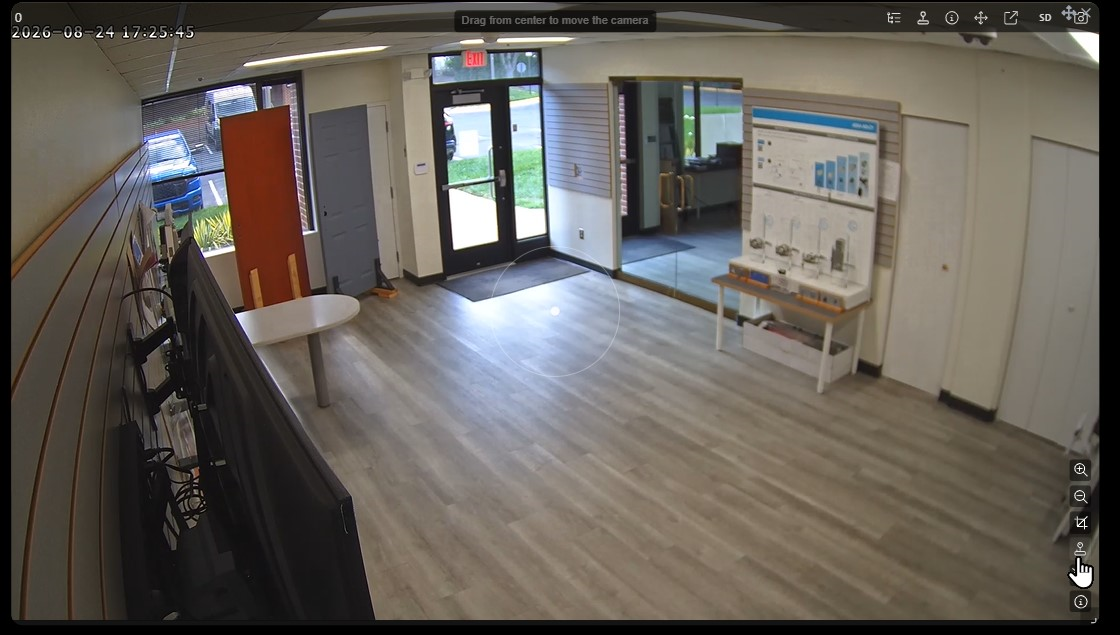
This is the fast route: it opens no windows and does not take you out of the dashboard, and it is what you want to follow someone crossing the scene right now.
In a separate window
The joystick in the top bar opens the full control panel in another window:
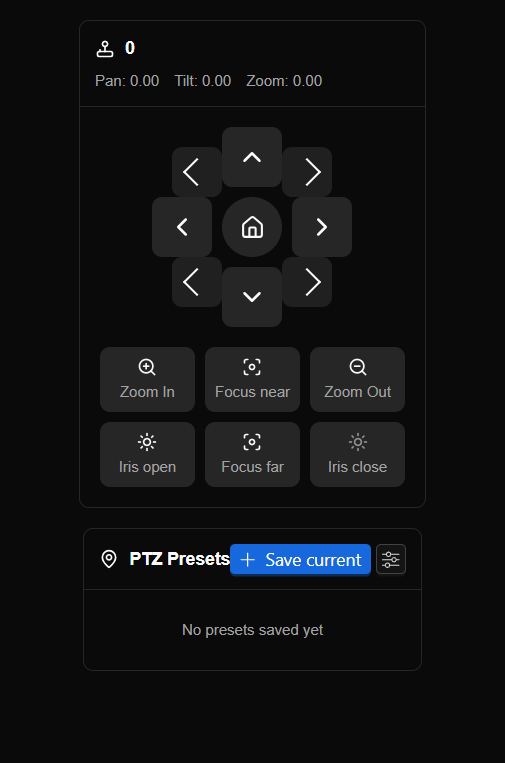
This is the complete route: besides moving the camera, it lets you adjust the optics and work with saved positions.
- The D-pad moves the camera; the center button returns it to its home position.
- Zoom In / Zoom Out zoom optically, unlike the panel's digital zoom.
- Focus near / Focus far adjust focus, and Iris open / Iris close the amount of light.
- The current Pan, Tilt and Zoom values are shown at the top.
PTZ Presets stores named positions through Save current. A preset is a memorized position — "main gate", "loading dock" — that the camera returns to with one click.
TIP: Defining presets is preparation work, not emergency work. Save the critical positions of each PTZ before you need them: during an incident nobody has time to frame a shot by hand.
When the video does not appear
| Symptom | Usual cause |
|---|---|
| The panel says Connection Error / Stream preparation failed | The platform could not prepare the stream: the device is offline or the driver rejected the request |
| It says the streaming server is not responding | A problem with the video server or the STUN/TURN configuration; it affects every camera, not just one |
| Every panel of a saved layout fails | The layout points to objects that no longer exist; it has to be rebuilt |
| I dragged a camera and nothing happened | It was not a video channel |
| The image stutters | Check Show stream stats: high packet loss or low fps point to the network |
Previous: Dashboard carousel · Next: Reviewing recorded video